|
7/12/2021 0 Comments Tips for Making a Cutting BoardSelecting Cutting Board MaterialsEvery project starts with material selection and this is no different, but perhaps you need to be a bit more picky than usual for a couple reasons. First your cutting board isn’t going to be very big and so every square inch counts for beauty. Pick woods that will look appealing and have no defects. You absolutely want to use hardwoods over softwoods and the harder/denser the better for durability. I probably don’t have to say it, but I will anyway: Stay away from pressure treated lumber, plywood, MDF, oak, poplar, cedar, pine or really anything that comes from a big box home improvement store. Those materials are meant for, well, home improvement. There, I said it. Lets move on. 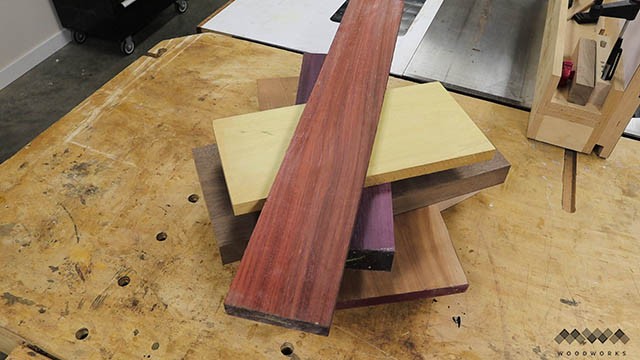 My Favorite Cutting Board HardwoodsAmerican (domestic) hardwoods:
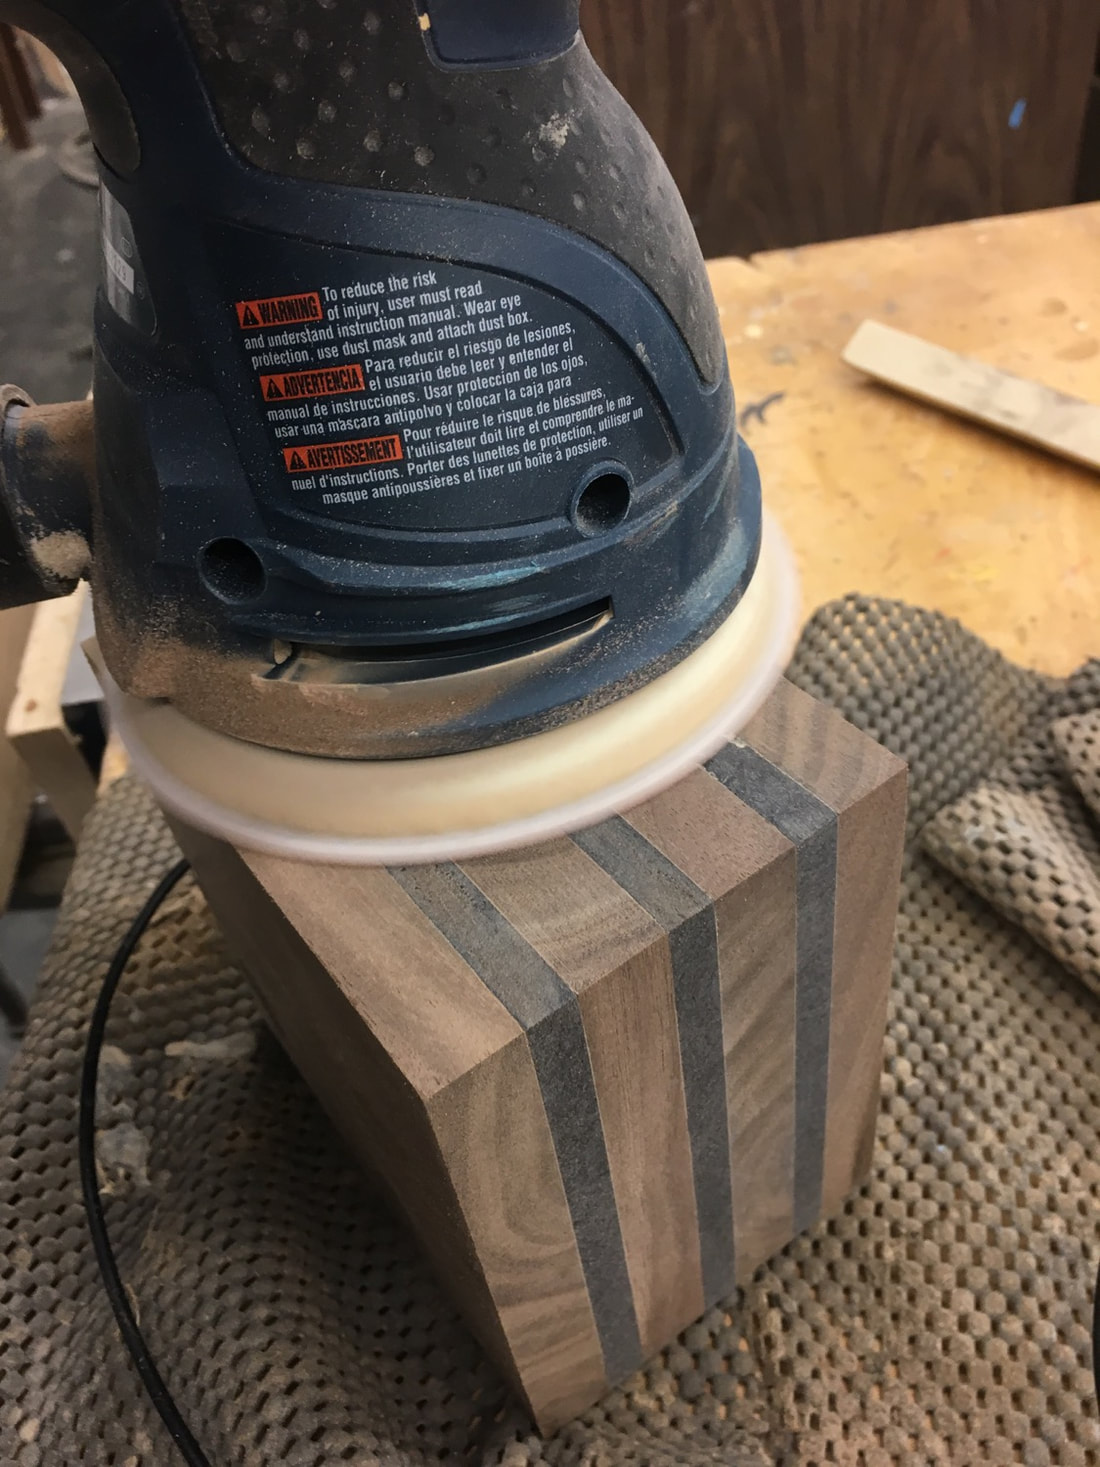
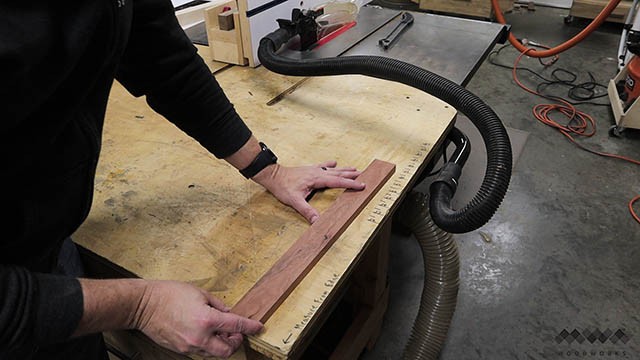 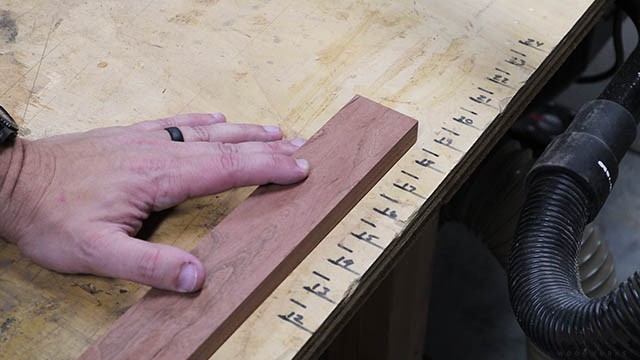 I even made this crude ruler on the side of my work bench to measure the length of the boards I want to use to make sure they will work in my board! Preparing The Cutting Board Parts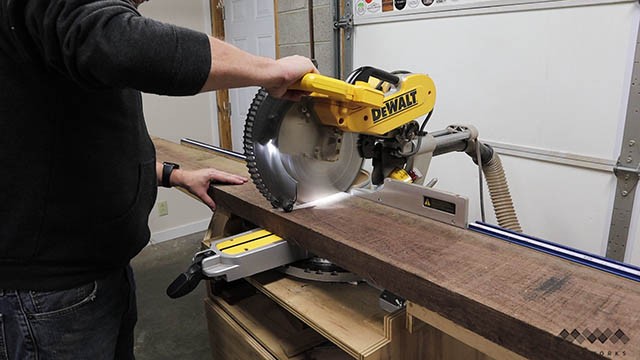 If you’re using long pieces of rough lumber, be sure to cut carefully at the chop saw because any bow in the wood can create a gap between the wood and the fence which when you complete the cut can cause pinching of the blade and KICKBACK! Be sure to complete the cut on the INSIDE portion (closest to the fence) first ans then the OUTSIDE portion. If your board is narrow enough to cut in one downward cut, then you should be fine. 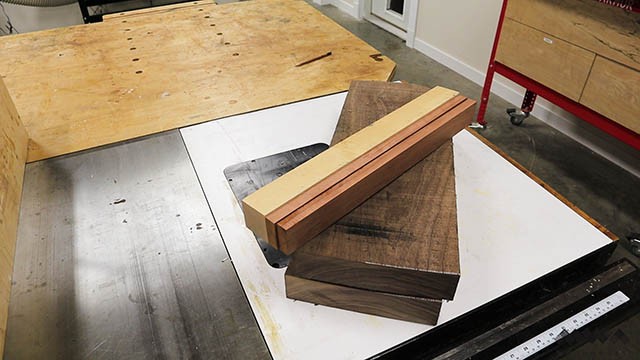 Take a quick moment to make sure you have rough cuts of all the woods going into your board now. This is just good planning before we move on to the next step! 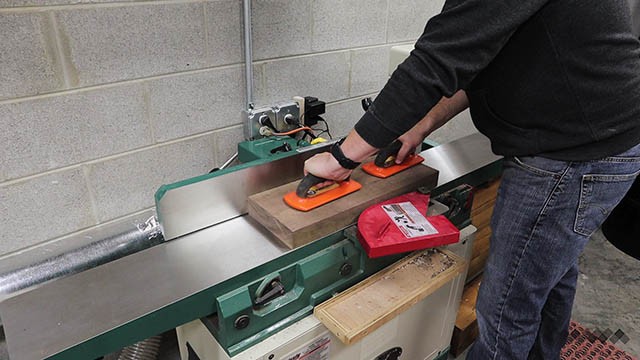 The first thing we need to do is flatten one face of our stock at the jointer. 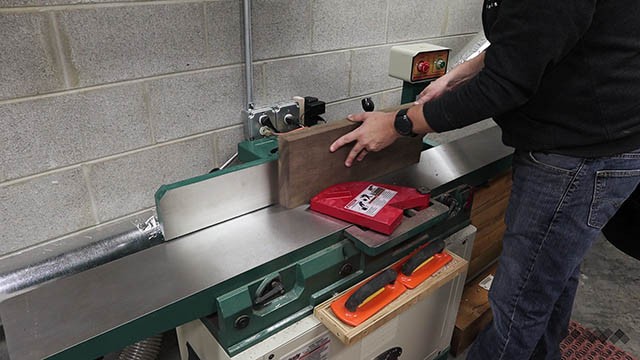 Then place the flattened face against the fence and run one edge across the jointer. This will square up that edge to the flattened face. 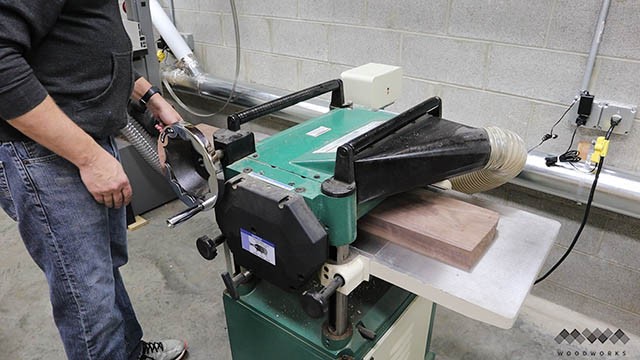 Next, take your parts to the planer and put the flattened face DOWN on the planer bed and flatten the opposite face. Now you have three flat and squared sides. 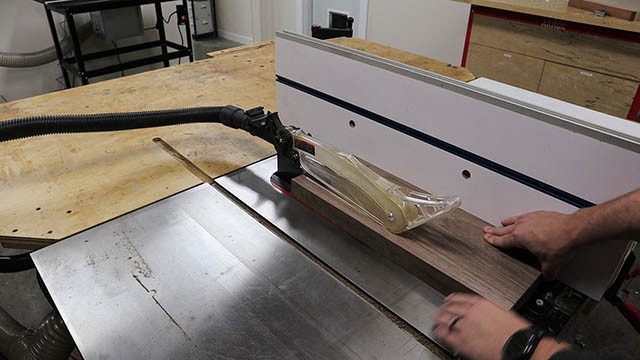 The fourth side can be take care of by ripping it at the table saw (well, most of the time it can) Getting Nice Glue Joints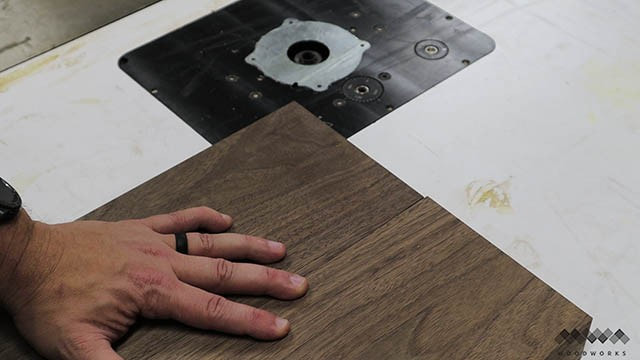 You can see here that this edge I ripped at the saw is kind of gappy on one end. That will cause a glue joint that can fail in the future, so we want to take care of that. 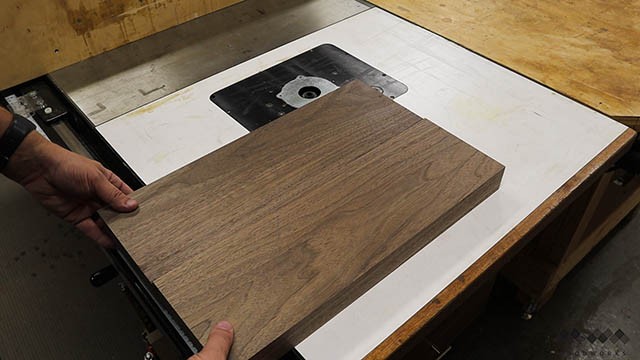 The best way I know to ensure a tight and seamless glue joint in your cutting board is to do the jointer trick. 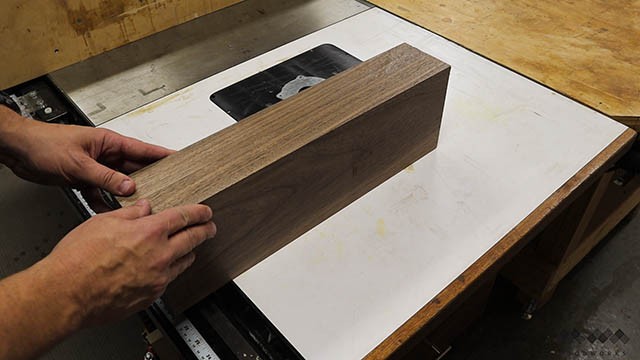 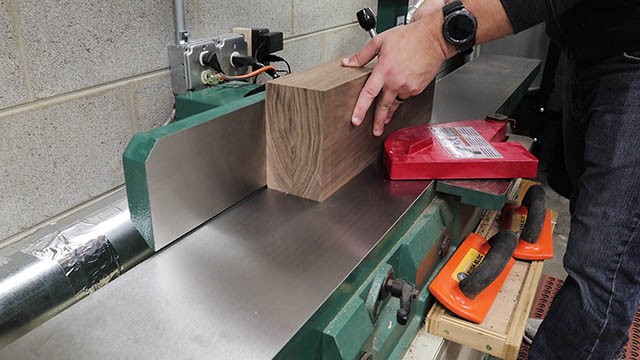 Doing this will cause you to cut supplementary angles on the edges of your work pieces. What this means is that even if your jointer fence is slightly off square, the resulting angles will add up to 180 degrees (flat) and this will match up to one another perfectly. 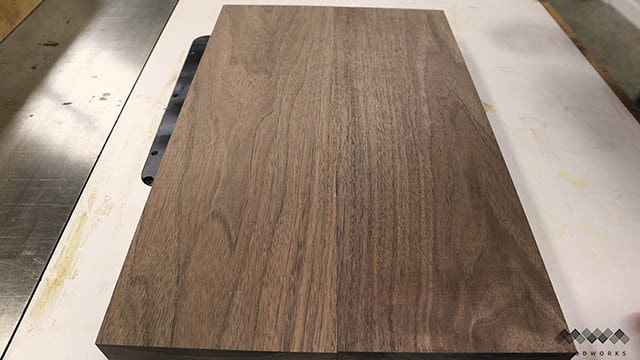 You can see the resulting glue joint here. A tight and seamless joint! Lets move on! Cutting Thin Strips Without a Jig Now that all our parts have been flattened and squared to one another we need to make room for our accent strips  To start, I am ripping 1 inch off the end of this board. 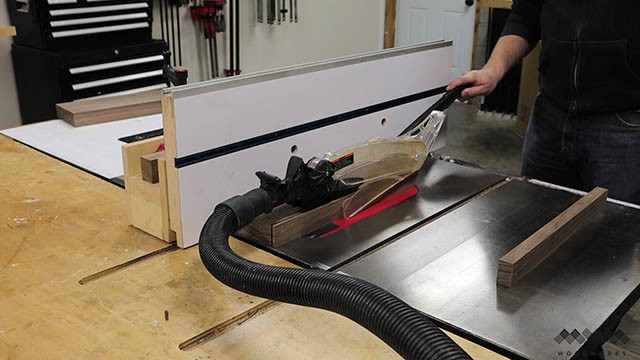 Then I need to make a series of 1/4″ strips for the cutting board. 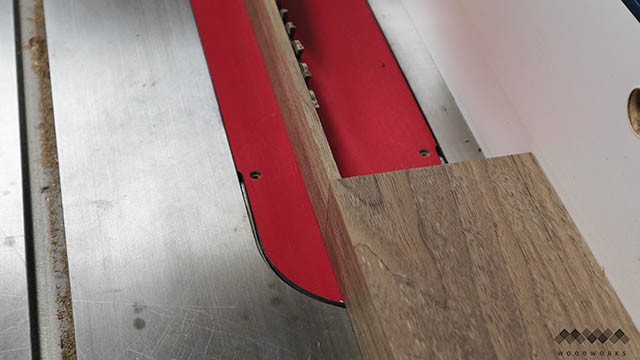 After I cut the first strip, I can line it up against the outside of the blade and move the fence and my work piece until the edge is flush with the outside of the strip. Now when I rip the work piece on the saw it will create a duplicate strip. 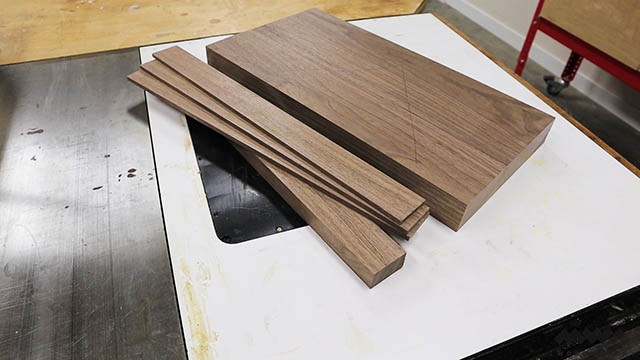 I want a total of three of these 1/4″ strips for my cutting board. 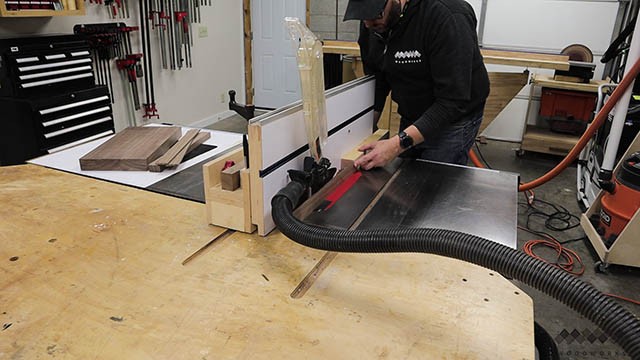 I also want two 1/4″ hard maple strips, so I repeat this process for those. Assembling The Cutting Board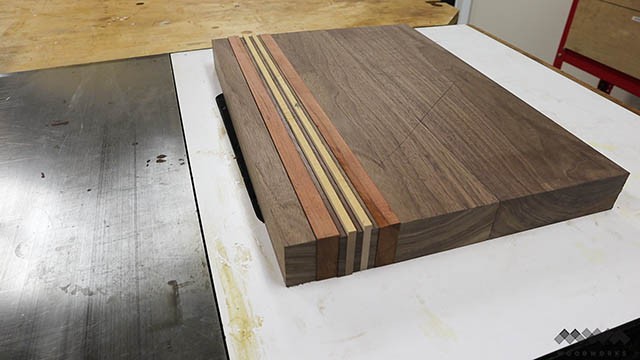 My two cherry accent strips already happened to be flat and square (sometimes I get lucky). So the next thing to do is arrange all the strips of your cutting board to get a visual of what the final board will look like. This gives you a chance to change things up or add other accent strips if you like before you go to the glue-up stage. 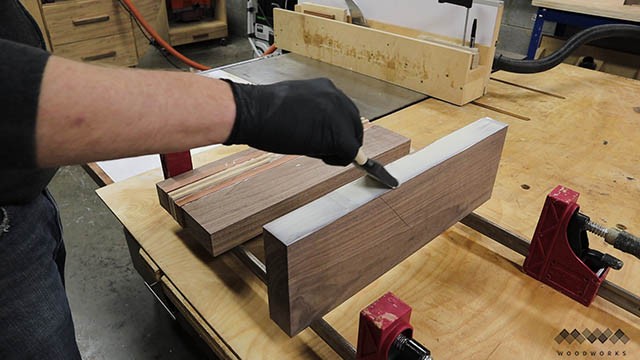 This glue up is simple enough. There are only a few parts and I’ve definitely tackled way more complicated board glue-ups than this one. It shouldn’t take long at all. I like to lay out my parts on the clamps so I don’t accidentally glue the wrong parts together. I then apply a water resistant wood glue using a foam brush. Over the years this has become my go-to way to spread the glue evenly without a fancy applicator. 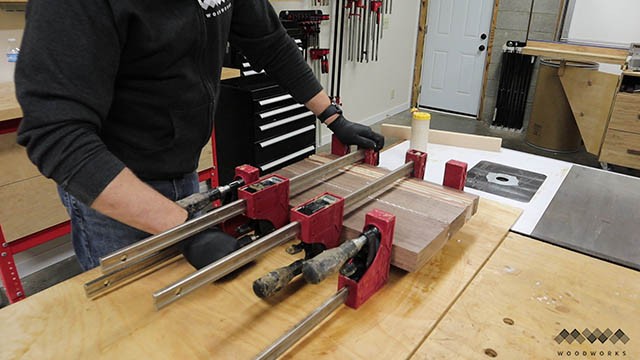 Next I apply pressure with the clamps. Two on top and two on bottom to help prevent warping the cutting board blank. You don’t need a ton of pressure here, just enough to get good even squeeze out along each joint. 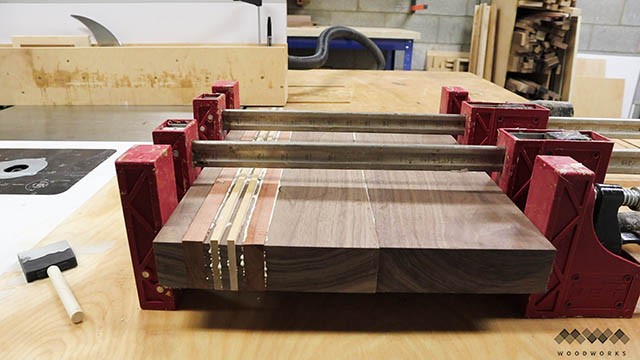 You can see here what the squeeze out looks like. There’s not a ton of excess glue either. Now just let the board sit just like this so the glue doesn’t run down the board. Cleaning Up The Cutting Board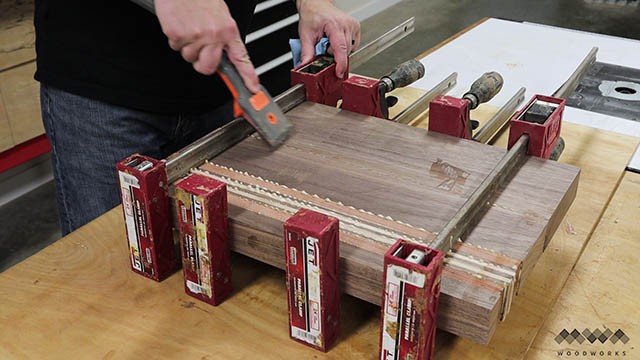 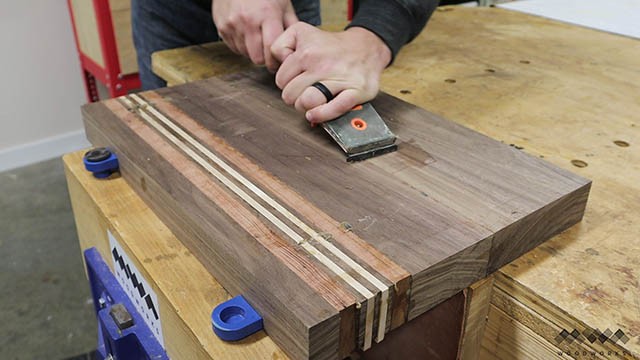 Now with the glue cured and the board out of the clamps, I use a scraper to get any of the left over hardened glue off the surface. This is a good ideas to do now because the next step really works in your favor if the bottom of the board (which you referenced off the clamps to keep flat) is free of glue bumps which can throw off the planer in the next step. 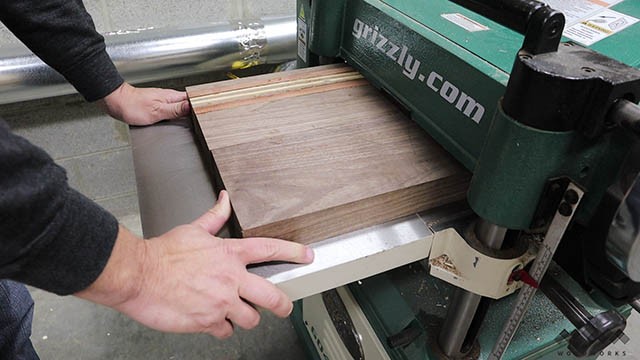 Next we will do a technique called “skip planing” in which we put the flattest side of the work piece down on the bed of the planer and take a very light pass. Then we flip and rotate the board and send it through again taking a shallow skim cut. Square Up The Cutting BoardRepeat this process of flipping the board over and rotating it 180 degrees until both sides of the board are planed flat. This process helps preserve as much of the thickness of the board as possible and helps make the cutting board as flat as possible. 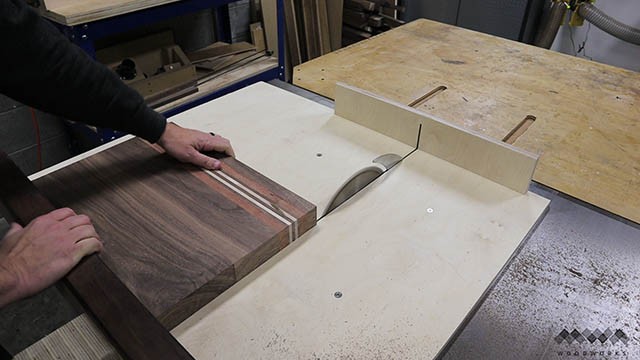 Now that we have a flattened board, we need to square up those rough glued ends. The best way to do this is with your cross cut sled. Pick one long side of your board and place it against the cross cut sled fence. Trim off one end of the board and then flip the board over, keeping the same long side against the fence. Then trim the other end of the board. Doing this ensures that the two ends are square to the one long side which is generally all you need to do. However it may bee necessary to then rip the fourth side parallel to ensure all four sides are square. 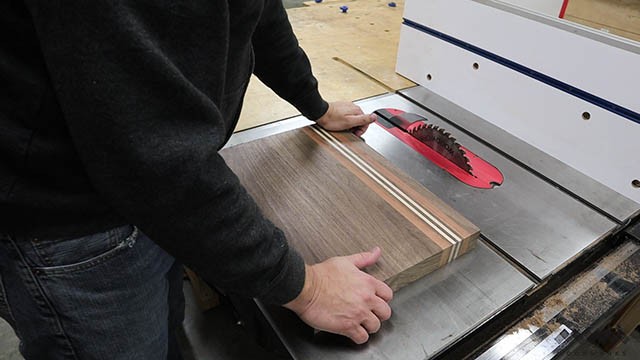 Its also a good idea now to check to see if the board is still flat and hasn’t moved on you. Sometimes doing all this cutting can relieve stresses in the wood causing warping. I use the flat cast iron top of my table saw to check this. You can also use a granite counter top in your kitchen if you don’t have a trusted flat surface in your shop. 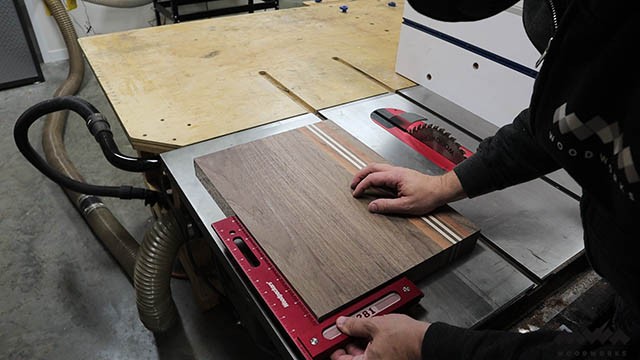 Normally I don’t check all four sides for square because for regular cutting boards there’s no real point. But I want to do something different with this board and it really only works well if the board is square. If you just want a standard cutting board, you can skip down to sanding the board. Otherwise keep reading on! CLICK HERE TO GET PLANS IN 3D
0 Comments
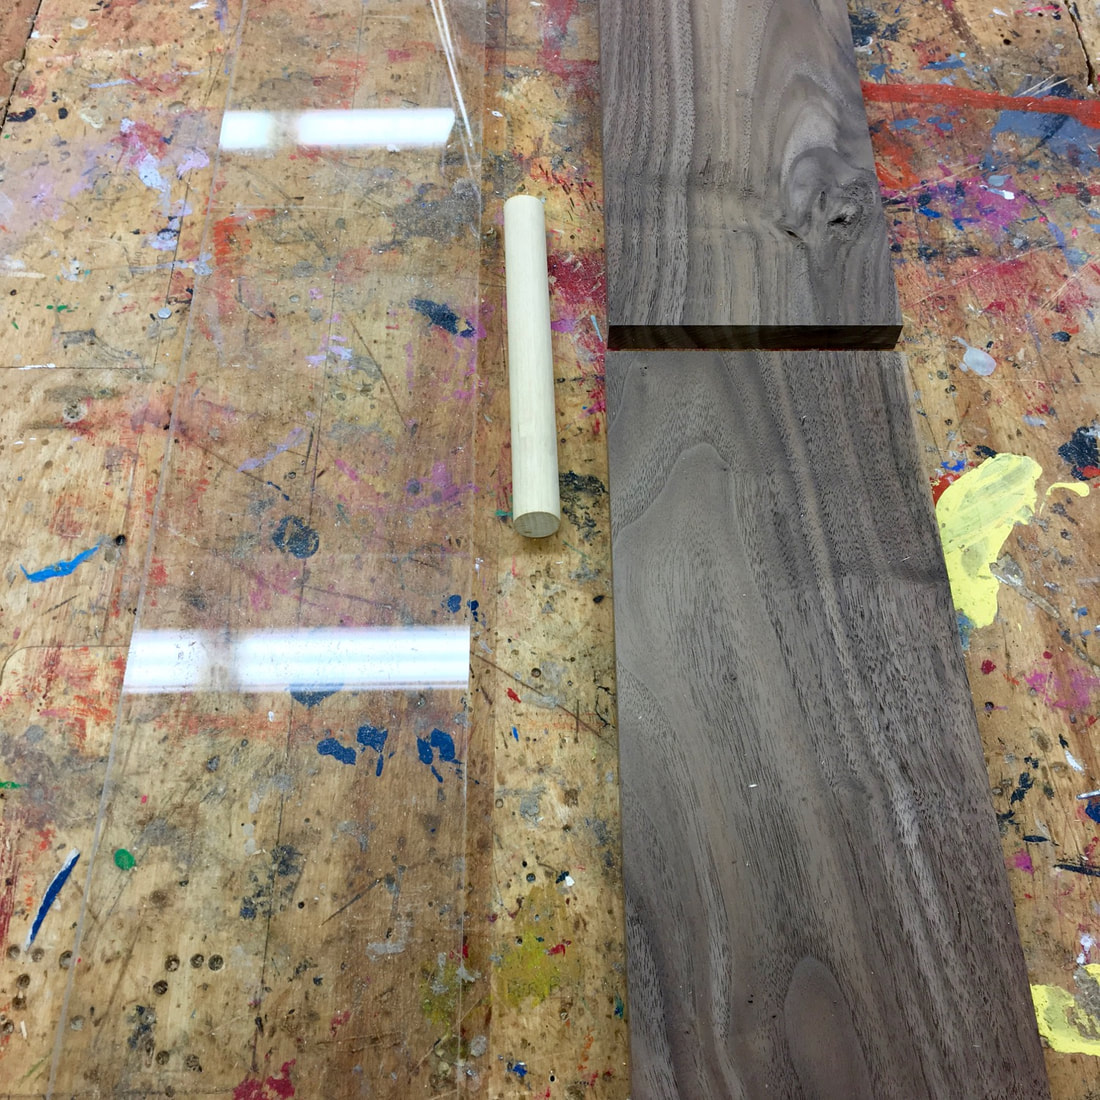
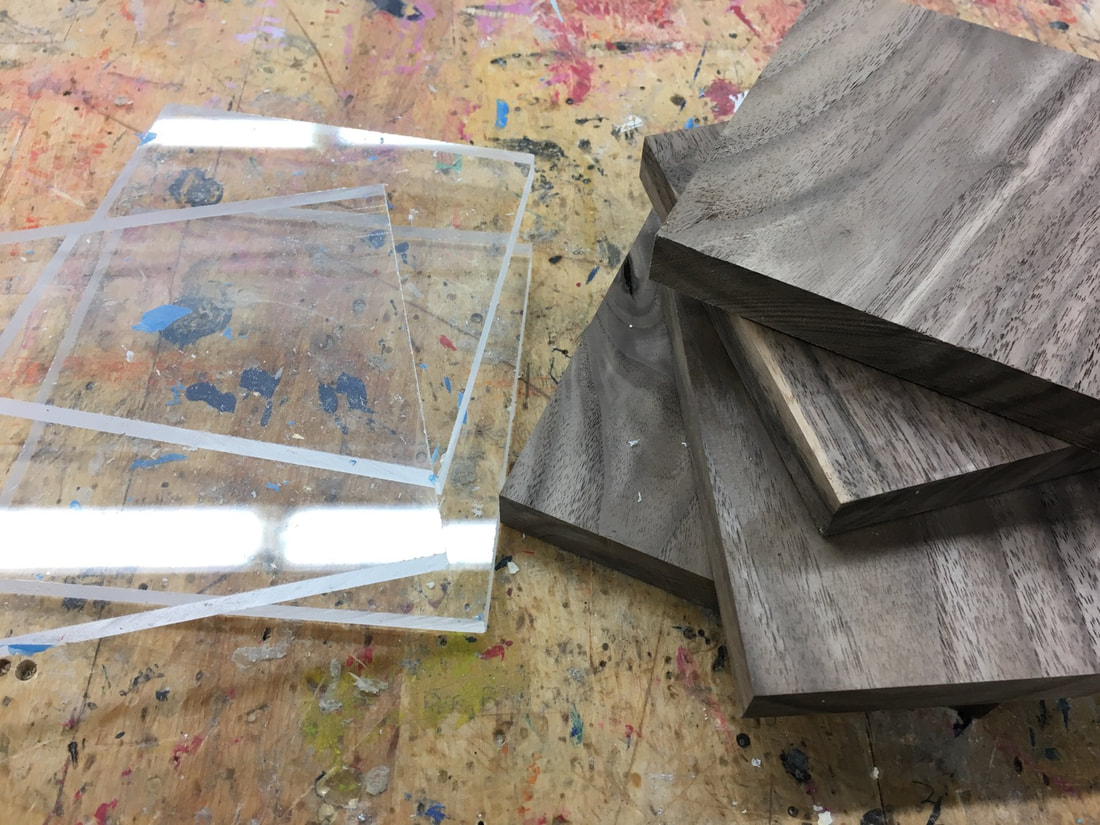
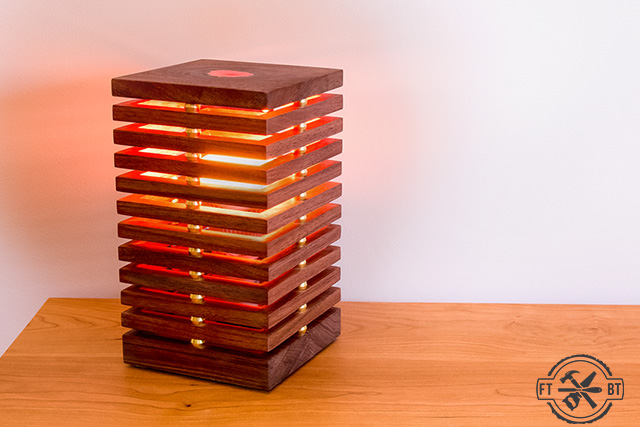 Today I’m going to show you how I made this modern DIY Desk Lamp with Color Changing LED Light. This DIY desk lamp has woodworking techniques to make walnut mitered frames that are spaced apart by brass sleeves. The top has a knot filled with gold epoxy resin for a little flair and translucence for the LED light to shine through. The LED light bulb I’ll be using is a smart home product that syncs with an app on your smartphone. This project is a part of the Smart Home series that I’m doing with The Home Depot. The mood lamp is a fun woodworking project and can be altered for an easy DIY project using store bought lumber. 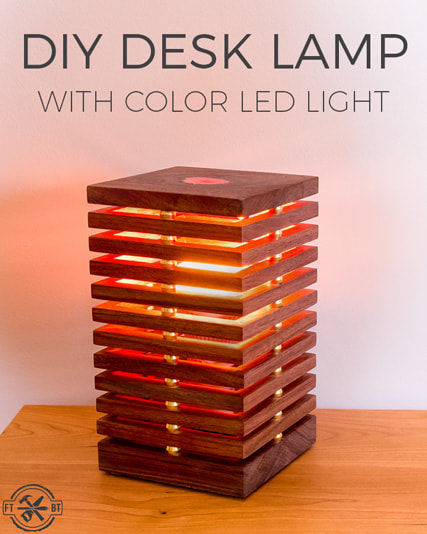 Here is what you’ll need for the project: Tools Used Table saw push block Bandsaw push block Bandsaw Jointer Orbital sander ISOtunes Bluetooth Earbuds Miter Saw Stand Materials/Supplies Wiz 60W A19 Color LED Bulb Brass Sleeves 5/16” Dowels 5/16” Drill Bit Lamp wire Light toggle switch Porcelain socket 2:1 Epoxy Gold pigment How to Make a DIY LED Desk Lamp
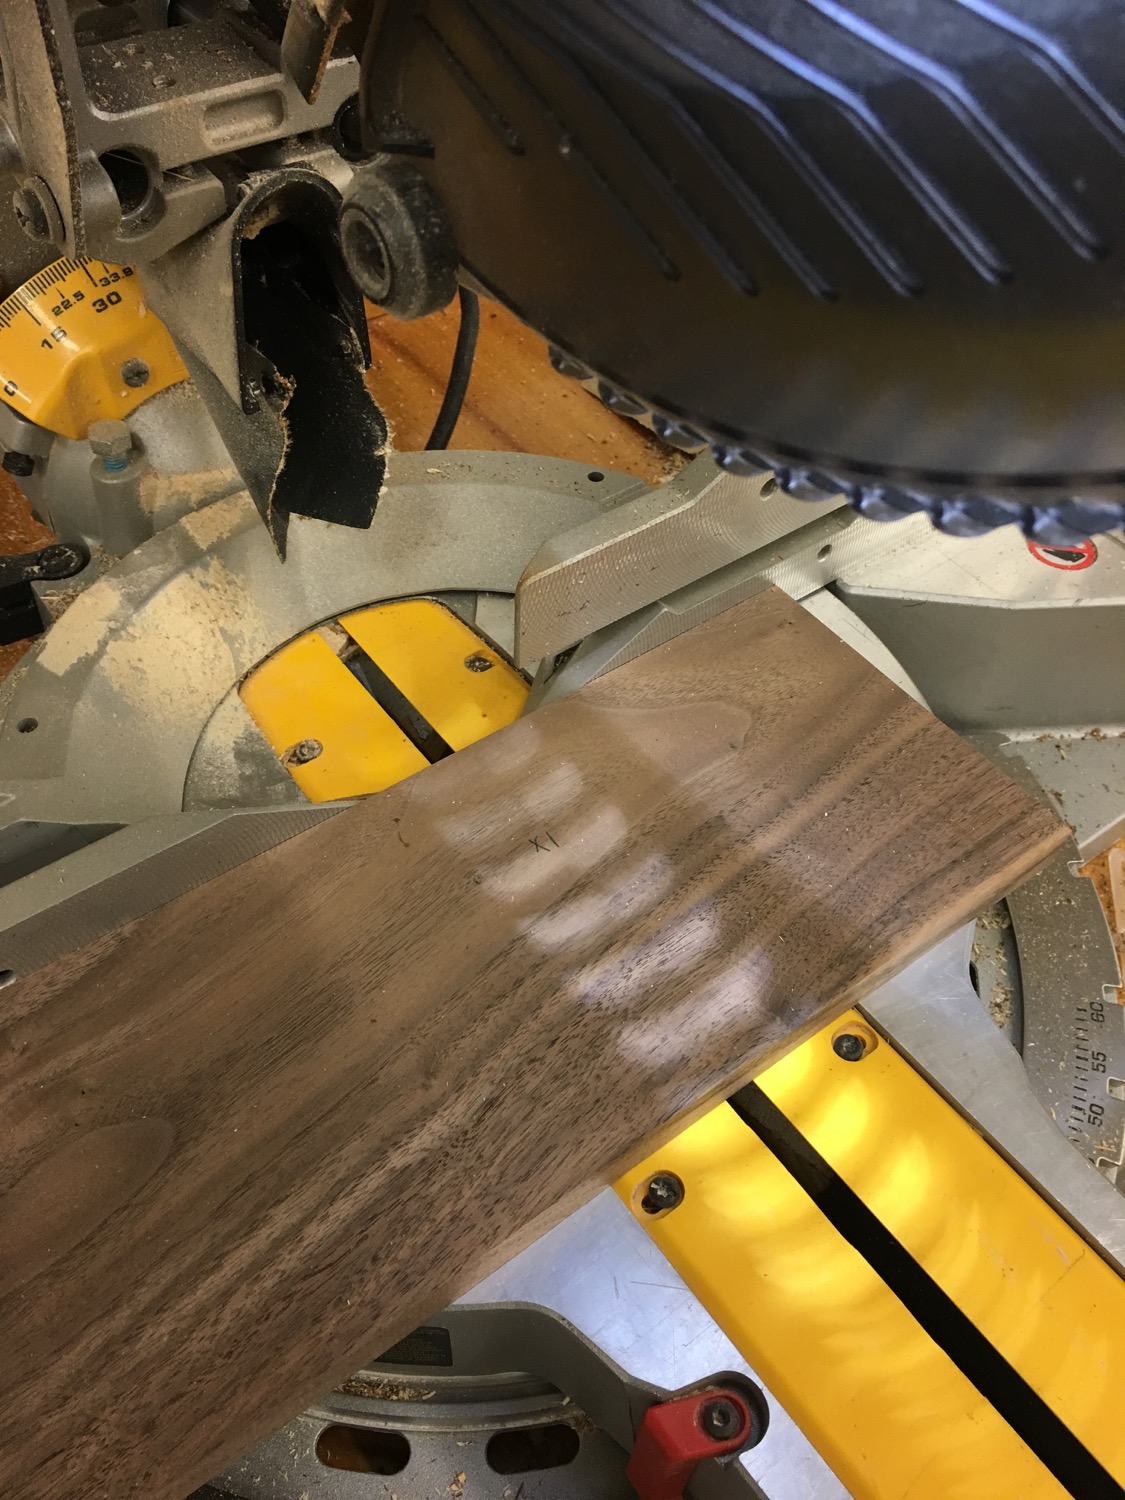
1. Cut Strips for the DIY Desk LampI’m using walnut boards for the DIY Desk Lamp that are just over 1” thick. This allowed me to split them in half and get twice as many pieces. 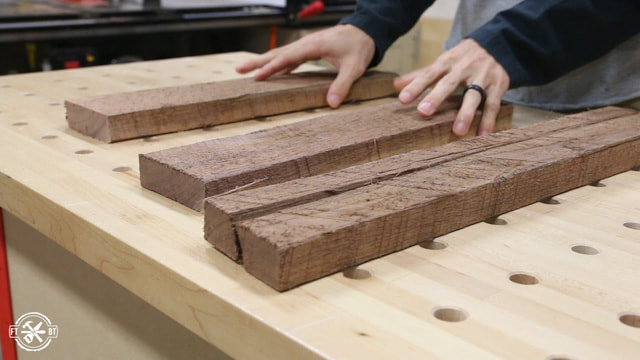 Next I took my boards to my table saw to rip ½” strips. 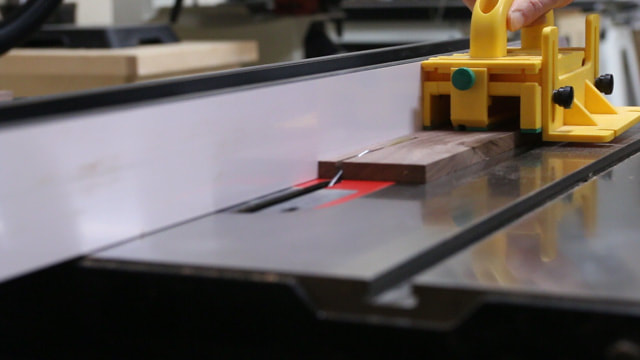 The DIY lamp is made up of a series of 10- 5” by 5” open mitered frames that sit between the base and the top. To make the mitered segments I set my miter gauge on my table saw to 45 degrees. 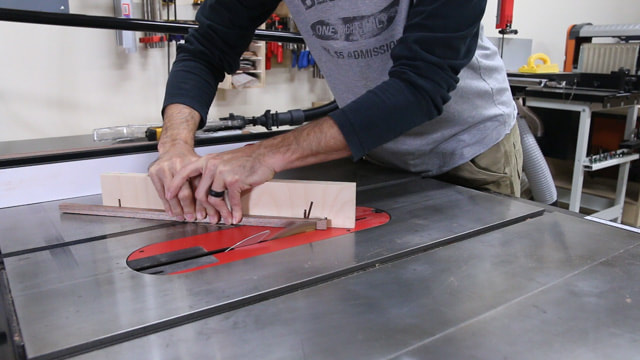 I made a 45 degree cut on the end of each strip. When holding the strips in place by hand, make sure to always keep your hands outside of the red throat plate area and to use caution.  I decided to switch to the miter saw where I could more easily control the work. I used a fence on my saw with a stop block at 5” then I used a bowed strip as a hold down to keep my fingers away from the blade. 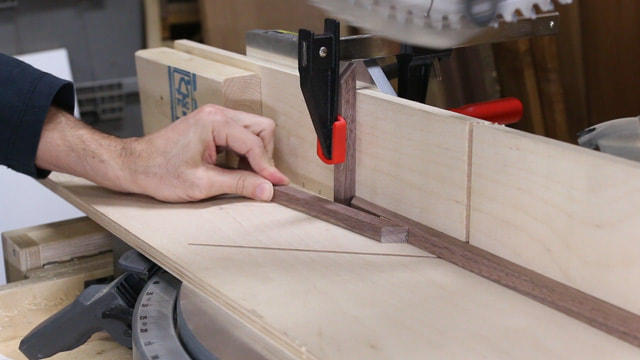 A 2×4 set against the far end of the fence let me push the hold down against the 2×4 and the strip to be cut to give it firm pressure against the fence. 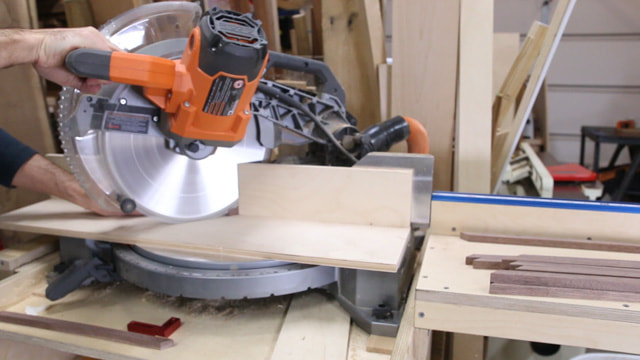 I cut a segment from each strip and went through the whole pile. Unfortunately the offcut end of the remaining strips weren’t clean cut. They had little nubs on the corner from the other side not being held tight. So I made a new miter on each strip and repeated the process all over. After three rounds of this, I had enough segments to make all the frames I needed. 2. Glue the Frames and Base for the DIY Desk LampNext I moved on to gluing up the frames for the DIY Desk Lamp. To get a nice tight mitered corner I laid out painter’s tape and lined the miters up next to each other. The tape will hold the corner tight and not let it move and create a gap. I skewed the tape to one side leaving the other side clean so I could sit it flush on a scrap of plywood for a flat glue up. To hold them together I used a thick clear drying glue which is perfect for this situation. 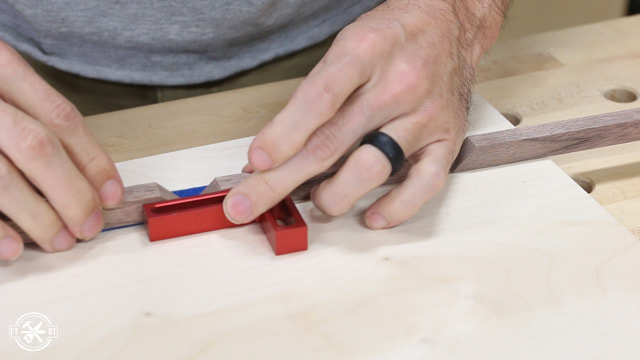 I didn’t put a whole ton of glue on the joints. And after the first couple frames I stopped even spreading it with my glue brush and just put dabs of the glue on one side of each joint. Again these are such small pieces they won’t be stressed and this glue will hold them just fine. 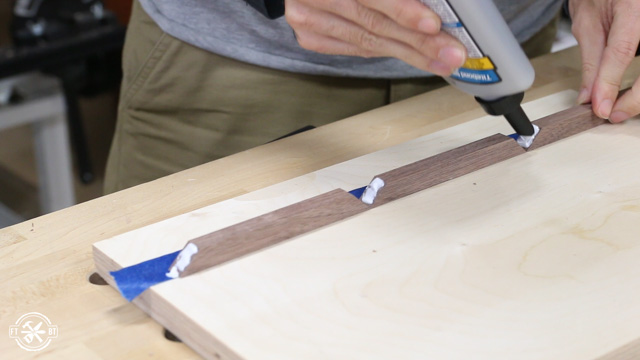 After all the frames were glued together I set them aside to dry. 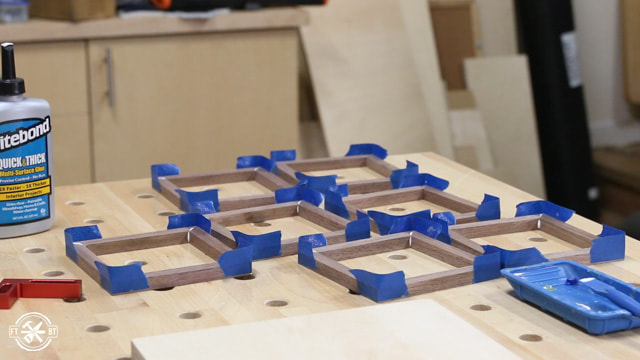 While the frames were drying I moved to the base. I made a small glue up of two walnut boards that were the full 1” thick to make the 5×5 base. 3. Make the Top of the DIY Desk LampI just made a video Top 5 Uses for a Band Saw| How to Use a Bandsaw and cut a board with a big knot hole in it from a walnut log. The knot was the perfect place for some epoxy to let light shine through the top of the DIY Desk Lamp. So I taped off the back to fill it with epoxy. 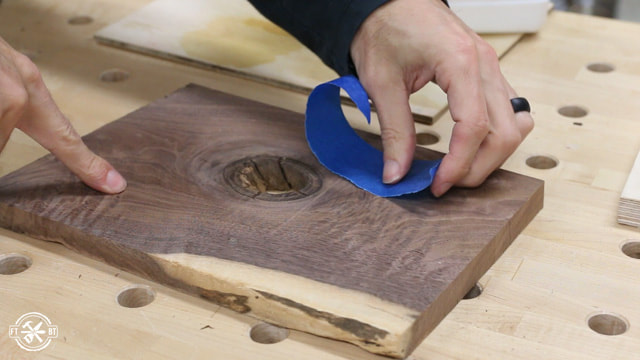 I mixed up a small cup of epoxy then added in the gold pigment and mixed it thoroughly to get a good cure. You always want to mix the epoxy well before and after adding the pigment to get the best results. The holes and cracks got filled with the gold epoxy to make a nice solid top.  When the epoxy was cured I sent the top through the planer to flatten the board and get it to my final thickness. Next I ripped the base down to the same width as the mitered frames. I used one of the frames from the DIY Desk Lamp for reference to set the fence for an exact match. 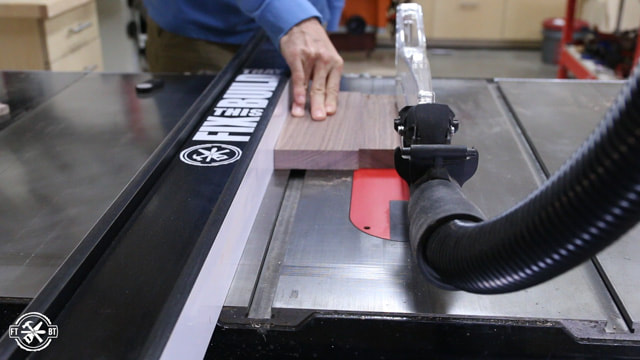 After that I pulled out my crosscut sled to cut the base and the top to final dimensions. Again I used one of the frames to line up my cuts. Using referential measurements is quicker and more accurate than transferring tape measure marks. 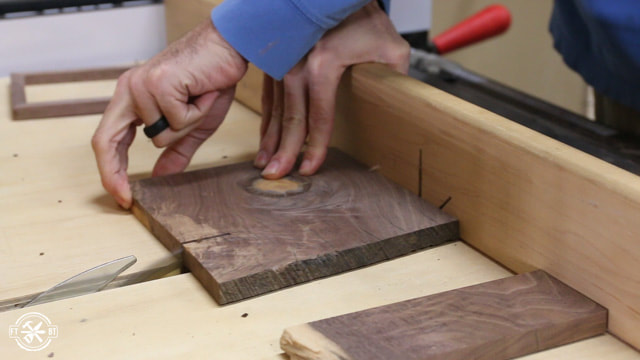 I repeated the same steps for the top and made all four cuts right on the table saw sled. 4. Drill the Holes for the Desk LampEach frame of the DIY Desk Lamp needed four holes for the dowel rods that hold the light together. I clamped and screwed down some stop blocks onto a temporary plywood table on my drill press. This setup let me drill a hole in the same location on each side of every frame. 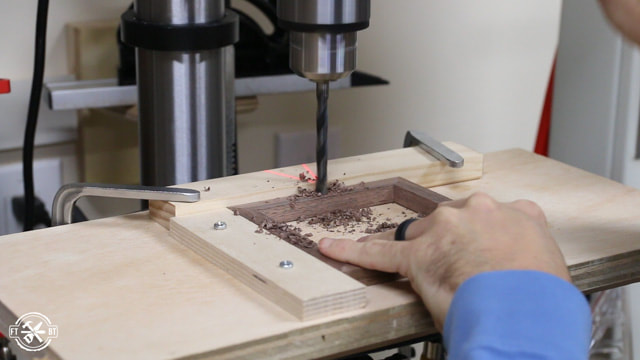 The top and the bottom get stopped holes instead of through holes. I used the depth stop on my drill press to get a consistent depth, but you could use blue tape wrapped around the bit to mark the desired depth too. 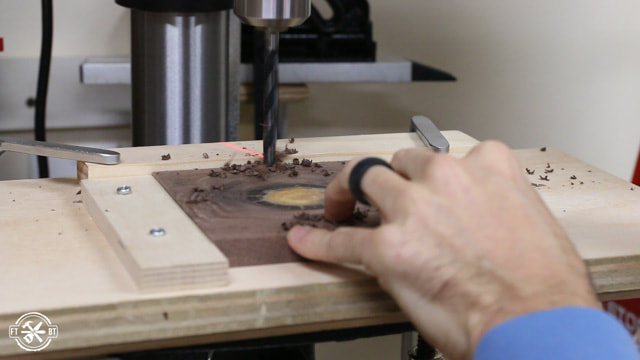 5. Wire the LED Light SocketFinally I needed to mount the LED light and run the wires. I used a forstner bit to drill a 1-½” hole on the center of the bottom about ¾” deep. Then I switched over to a ⅜” bit and drilled a hole all the way through the base for the wiring and mounting hardware. 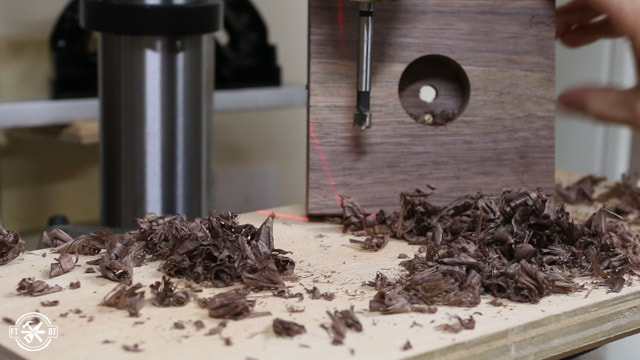 To feed the wire out the back of the light I marked for a hole just under where the dowel rod would stop. I drilled through the base and made a path for the wire to run from the center out the side 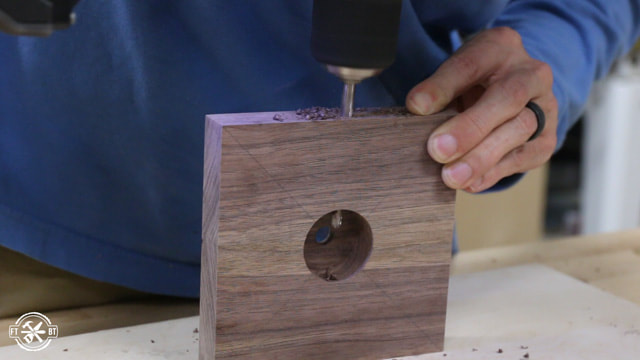 I’m using a porcelain socket with a thread on adapter to wire the lamp. The socket and adapter are held in place with a threaded nipple and some locking hardware. 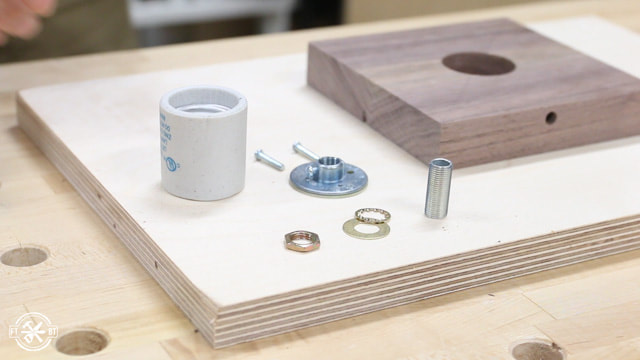 I set the lock washer and hardware onto the nipple and fed it through the base and into the adapter plate. The adapter plate has a small set screw that locks it in place on the threads. Then I used a wrench to tighten the nut and lock washer on the underside of the base for a snug fit. 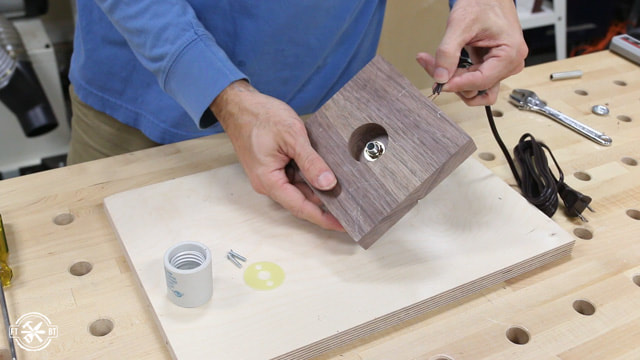 I fed the lamp wire through the hole I drilled and pulled some extra through. Attaching the socket wiring is fairly straightforward, follow the instructions and have a certified electrician do this if you aren’t comfortable. Then the socket can be put on the adapter and screwed down. 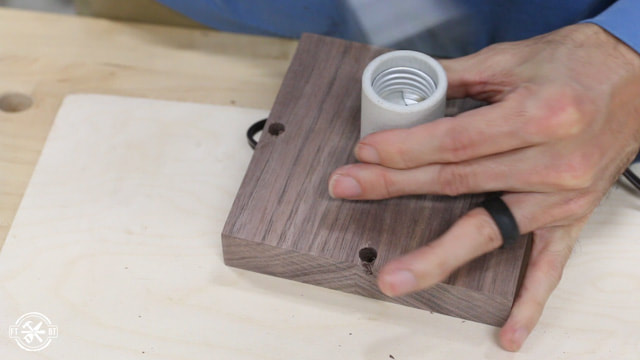 After securing the socket I tied a knot in the wire to keep it from getting pulled out. I attached a toggle switch to the lamp wire by separating the wires to run them through the switch and following the instructions on the package. I screwed in the Wiz 60w color LED bulb to give it a test run, and it fired right up! 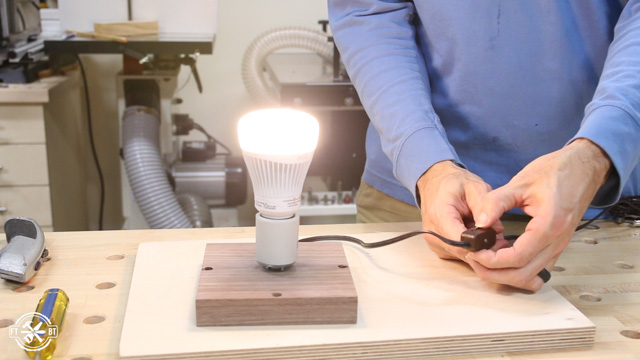 Home Depot sent me this 60W equivalent LED bulb from Wiz as part of the Smart Home campaign I’ve been doing this year. It connects to your phone over your wifi network and let’s you change the color temperature of white light or select a full range of colors.  It’s a great plug and play way to add color and mood settings on this or any desk lamp. There’s a link in the description to learn more about it. 6. Assemble the DIY LED Desk LampI sealed the walnut with a wipe-on oil-based polyurethane. 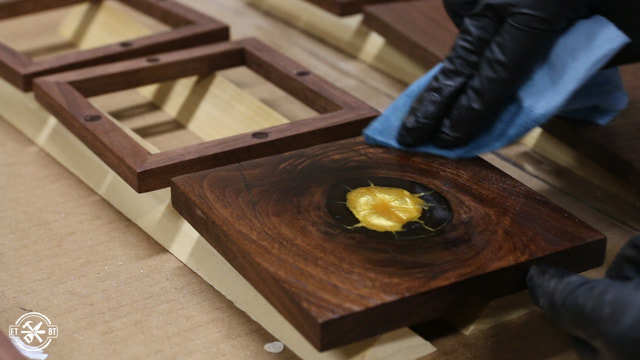 To assemble the lamp I used 5/16” dowels. I measured the stack of frames and then added in the length of the brass sleeves, and the recesses in the top and base. 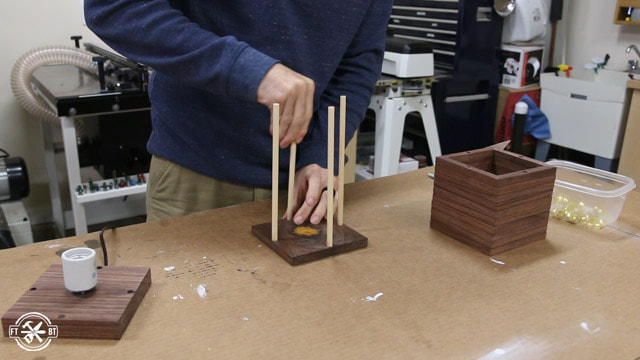 Next I cut the dowels to length erring a bit on the long side. Any excess can be trimmed after assembly. I started sliding the frames onto the dowels and it wasn’t easy going. So I pulled them back out and gave the dowels a good sanding to ease the fit. After that assembly was a lot smoother. I turned the top upside down and put a brass sleeve over each dowel. These sleeves are just compression fittings for plumbing but they work great to cover the dowels and add some flair. I added frame after frame pushing them down together with brass sleeves between each one. 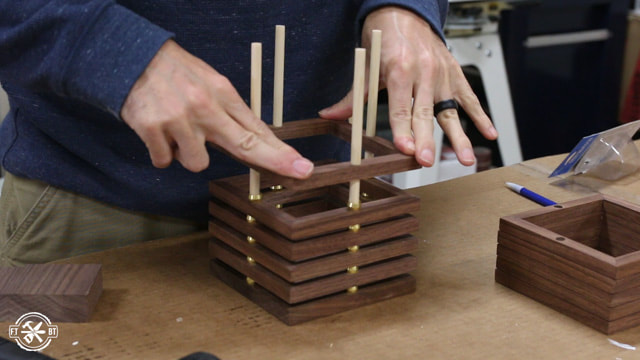 Originally I was going to glue the dowels to the base, but the fit was so tight I decided against it to make any repair that much easier. Instead I pushed all the pieces down to the base and marked the excess dowel showing after the top went on. I used my pull saw to cut off the excess length of the dowel. Then I rounded over the ends of the dowels to make putting the top on a little easier. 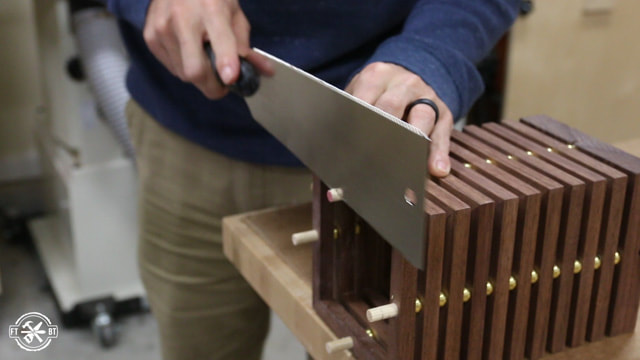 I added some rubber feet for the bottom, installed the bulb and put the top back on and it was ready for primetime. This will be a fun lamp to have on the desk to add a little light but mainly I’ll have fun playing with the colors. 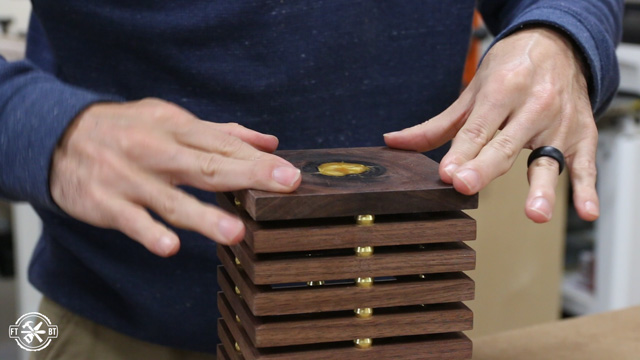 Get access to 16,000 woodworking plans >>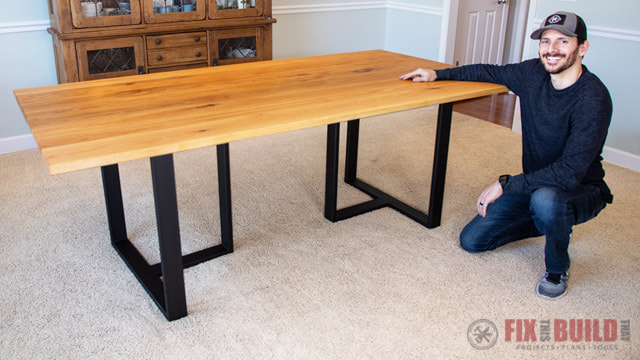 Have you been planning to build a slick wood and metal dining table? Maybe one with a welded base and a custom wooden top? Yeah, me too. This project has been on my list for years and it’s finally done. I designed this dining table to have a modern welded base and a custom white oak top. The table top is seven feet long and four feet wide. This was a fun project to make and I can’t wait to show you how everything came together. Come along for the ride and I’ll show you how I turned some metal pieces and rough lumber into a thing of beauty… if I do say so myself. Before we get started, make sure to follow me on YouTube, Facebook and Instagram to keep up with all my latest builds! Here is what you’ll need for the project: Tools Used Kreg Track Saw & 62” Rail JET 13” Planer JET 8” Jointer Biscuit joiner Metal Cutoff Saw Lincoln 210MP Welder ISOtunes Bluetooth Earbuds Miter Saw Stand Flip Top Tool Stand Materials/Supplies Hardwood of your choice 1×3 rectangular tube steel 1/4″ steel plate Total Boat Epoxy Threaded inserts Primer Flat black paint Rubio Pure Finish How to build and wood and metal dining table Pick lumber and start initial milling Finish milling of lumber Glue up top and fill in holes Cut metal parts for base Weld table base Finish and mount table top 1. Pick Lumber and Start Initial MillingI built this dining table using white oak boards I got from my buddy Matt from Rustic River Creations. Matt makes custom tables and furniture south of Nashville and has an impressive shop. He hooked me up with some sweet boards, but they needed to be milled up. 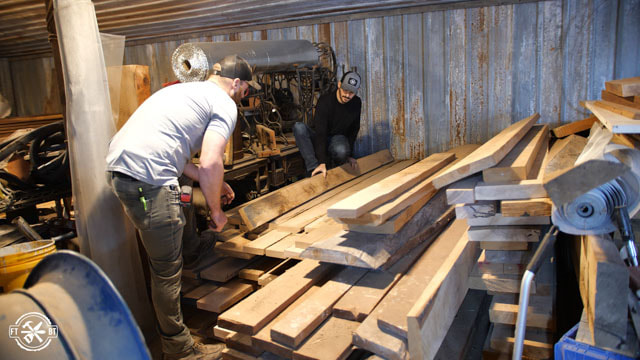 Even though we picked some of the straighter boards, we’re still dealing with rough lumber and these suckers were 9 feet long and 1-½” thick. So Matt, being the stand up guy he is, graciously offered to help me mill the boards to get a flat face and one straight edge. We cut the boards to rough length and then ran them through his ridiculously large 16” jointer for face and edge jointing. This got the boards flat on one side and one edge. 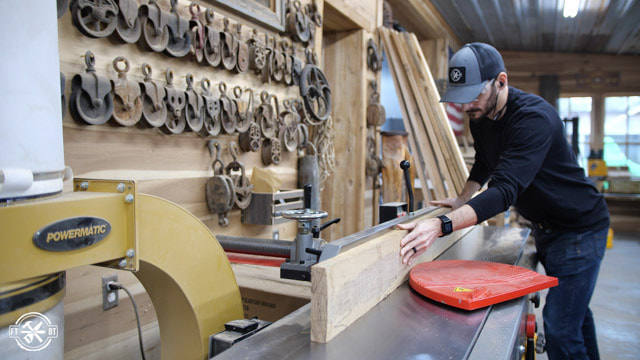 Honestly I don’t think I could have managed lumber this size in my current shop setup. So if you don’t have a friend like Matt you can look for lumber yards that sell both rough and milled lumber. What we ended up with would be called S1S1E which means Surfaced 1 Side and 1 Edge. This will let me finish it off in my shop to my exact dimensions. 2. Finish Milling of LumberOnce I got the boards back to my shop I let them sit for about a week to acclimate. Then I ripped each board down to their final width. I determined how wide I wanted them to be based on the overall width I wanted for the table top, which was 40 inches. 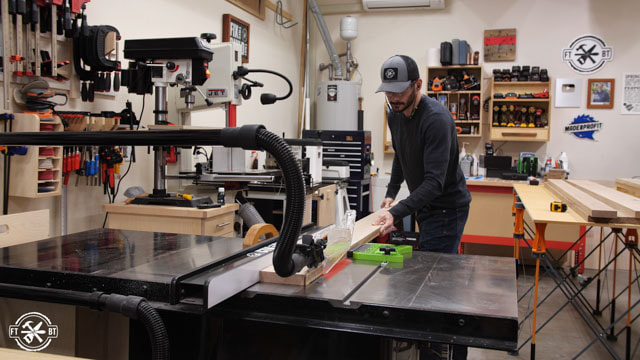 Next I laid out all of the boards I’ll be using for the table top and clamped them together. This shows me where I have spots with gaps between the boards. Then I marked those spots with a pencil, folded the boards together like a book and ran them through my jointer together. This will eliminate any gaps caused by a slightly out of square setup on your jointer. 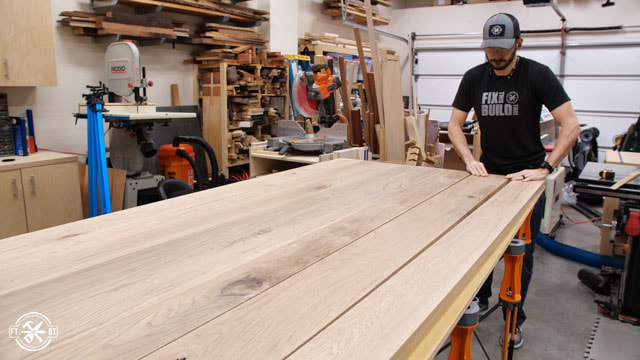 I went through and folded up each set of mating boards that had gaps and ran them through the jointer until everything fit tightly. After that I laid the wood back down just how the top would be attached and put a big V across all the boards as a reference mark to keep them in order. Next I went through and made marks across the joints about 20 inches apart for biscuits that I’ll use for alignment during the glue up.  I cut slots in all the boards for the biscuits and then did one final dry fit to make sure everything was good before glue up. The last thing you want here is to run into an issue when you’re 3 minutes deep into assembly with glue drying while you panic…believe me, I’ve been there. 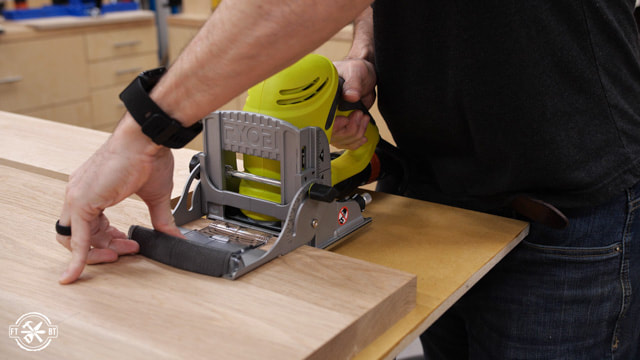 3. Glue Up Top and Fill In HolesWith all the prep work and dry fittings done, the glue up should go smoothly since you know how all the boards fit together. I glued one board at a time putting the biscuits in for registration and lining the boards up with the marks I’d made earlier.  I used a mallet to level out a few spots that had crept up and then put a few more clamps on the top. After 45 minutes I came back and scraped the partially dried glue beads off the top. It makes final flattening a bit easier, plus it’s super satisfying. 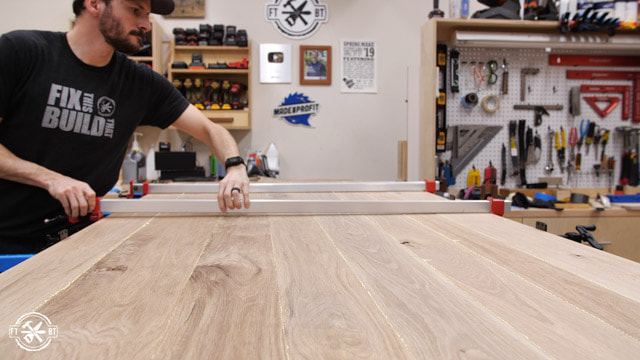 The next day I came back and cleared out any of the knot holes in the table top and gave it a rough sanding to 80 grit in a few spots. I marked all the spots that needed filling with blue tape then mixed up some epoxy. To fill the holes I used Total Boat epoxy and instead of leaving it clear I add some mixol black tint. I think the black accents the knots without being too gaudy.  4. Cut Metal Parts for BaseThe table will have a metal base at each end made from 1×3 rectangular tube steel. Each base is a T shape on the floor with vertical supports going up to a top plate. I started off by cutting the six vertical leg parts to rough size so I could manage the steel more easily. 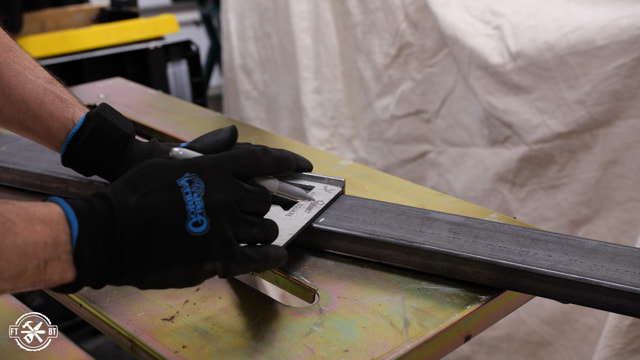 Each upright is square at the top and will be joined to the lower T-shape with a 45 degree miter. I set the fence using a carpenter’s square, which I think is illegal when metalworking, but don’t tell anybody. I finished up cutting all the miters on the legs then switched to the lower T pieces. The longer top portion of the T has miters at both ends to match up with the legs. 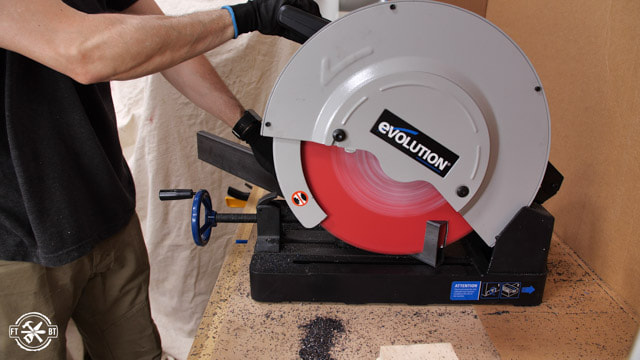 I finished up by cutting all the legs to final size. A scrap block clamped down to the bench gave a stop to make repeatable cuts. Since I’ll have six legs to deal with the chances are pretty high it can get out of whack, so starting with exact size pieces at least gives me a fighting chance. Next I went outside and ground down all the parts where they would be welded to give me a good base for the filler material to go. 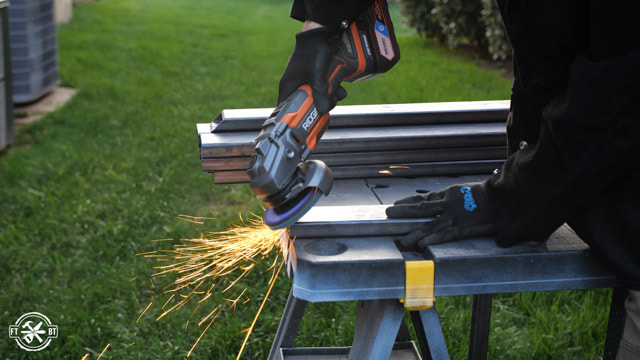 5. Weld Table BaseI started welding the base by using my Lincoln 210MP Welder attaching the upright legs to the lower piece that had two miters. I tacked those pieces in place and then marked and cut a top plate from ¼” flat bar stock. The top plate will extend a few inches past the legs on each side for extra support for the top. 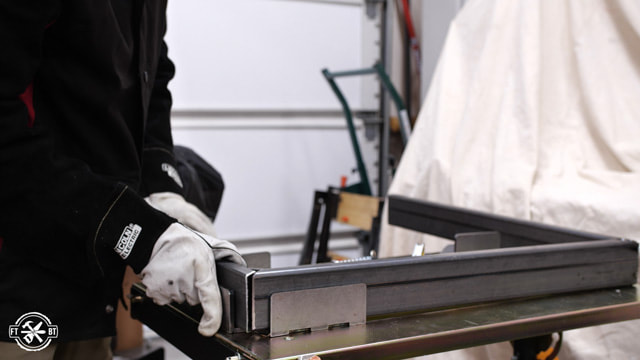 Next I turned the assembly upside down on top of the flat bar and pried it back into square using a spreader clamp. The heat from the welds will tend to move the metal so checking everything for square before welding is crucial. After tacking the plate in place I went around and finished all the welds on this square assembly. 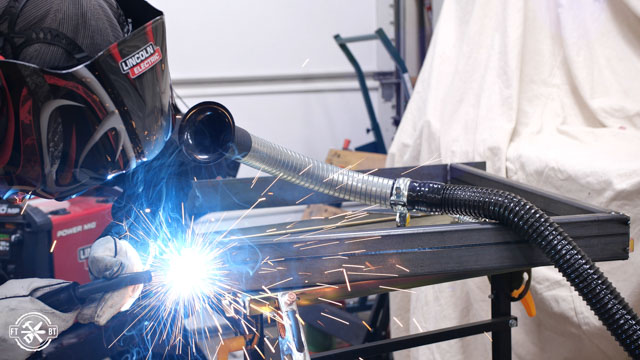 Then I clamped and welded together the third leg to the small base piece. From there I butted this assembly against the square I’d already made to form the T-shape. 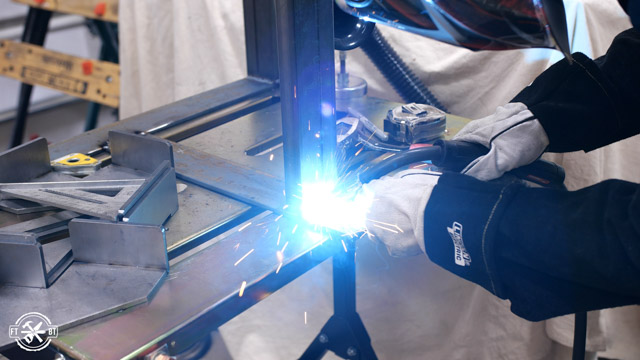 And the last piece of the puzzle was to flip the whole thing over and add another top plate to lock everything together and then repeat the whole process for the second base. 6. Finish and Mount Table TopI went back to the table top and I knocked off the majority of the epoxy with a block plane then finished smoothing off the surface with 80 grit sandpaper. 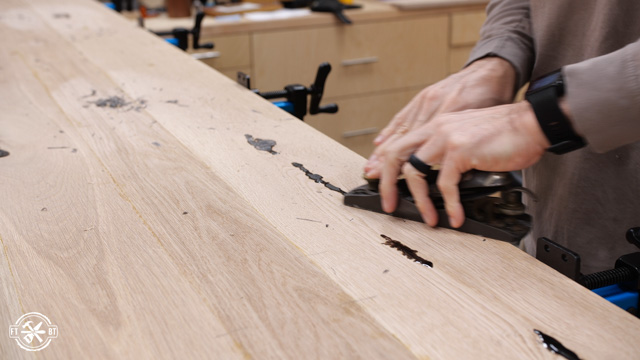 We left the boards about six inches long when we milled them. So I measured in 3” from each side, set my track saw square at 90 degrees to the long edge and cut the table to size. 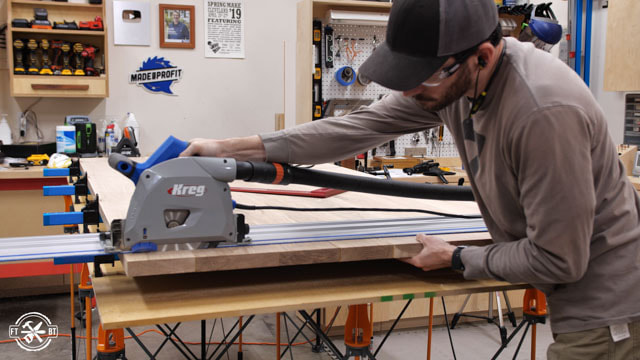 Next I drilled mounting holes in the top of the bases at the ends and the intersection of the T. I used a step bit and drilled them a bit oversized to allow for wood movement. Then I hoofed the base up on top of the table (which was bottom side up) to mark through each hole for the inserts. 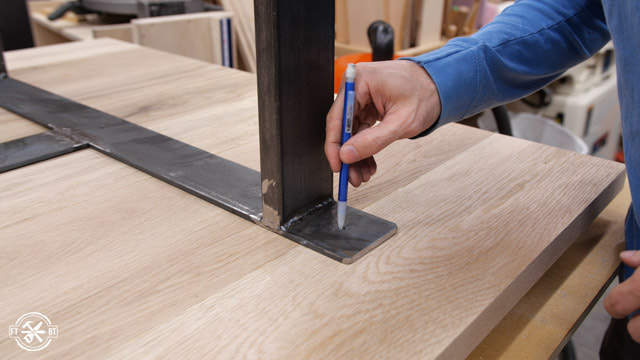 After that I could take the bases outside and prime and paint them with a matte black finish.  While the paint was drying I finishing up the top by adding a chamfer on all the edges of the table. Then I decided to apply finish to the bottom before doing the inserts. I used rubio pure as my finish and I really love how it turned out. Finally I used a center punch where I’d made the pencil marks for the inserts. I drilled out the holes for the inserts and installed them with an impact driver. 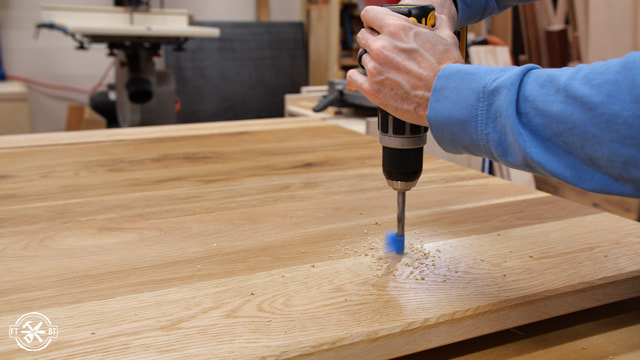 Then we flipped the table over again and I finished the top with the rubio pure. I made sure to spread the finish on first so it’s not pooled anywhere and I went back over it with a sander and white pad to buff things in 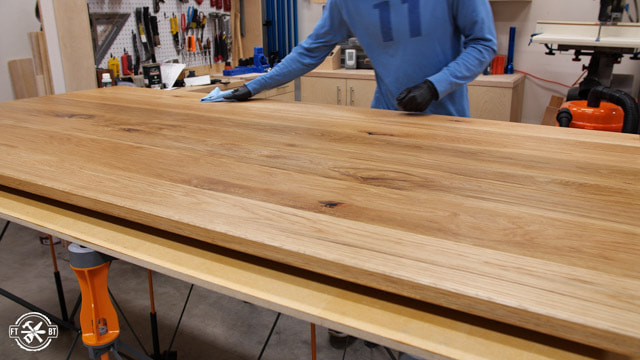 And that’s how I build my metal and wood dining table! If you liked this project you should check out my other Furniture Projects. 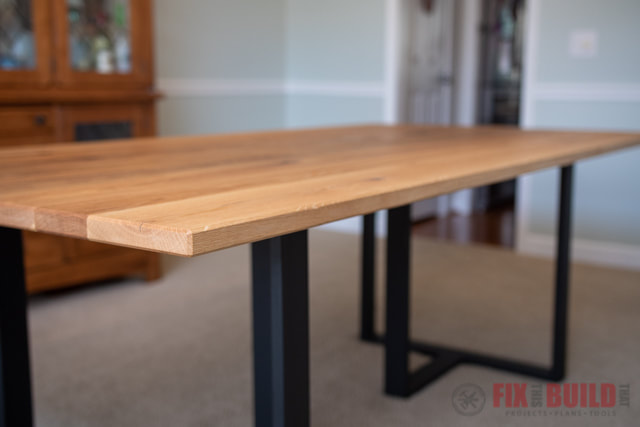 Get access to 16,000 woodworking plans >>
Build a simple DIY ladder out of pine so you can display your beautiful blankets or throw rugs instead of folding and stacking them away. This wooden ladder can also be used in the bathroom with towels to save cabinet space. 1MEASURE AND MARK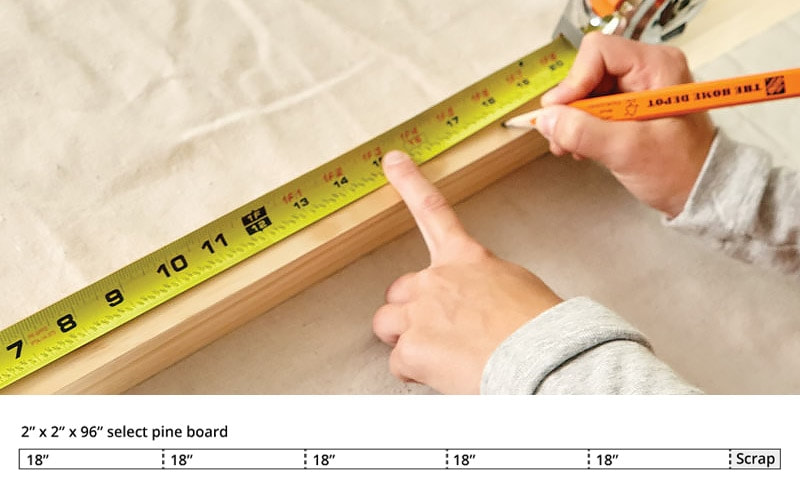
2MAKE CUTS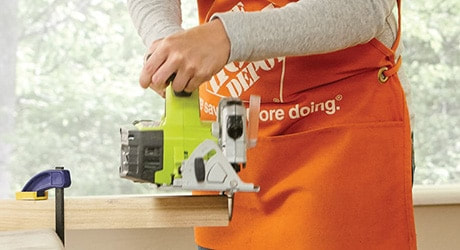
3APPLY PAINT OR STAIN Paint or stain all cut pieces prior to assembly. 4DRILL HOLES FOR ATTACHING RUNGS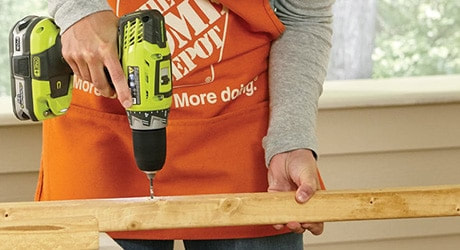
DRILL HOLES INTO EACH RUNG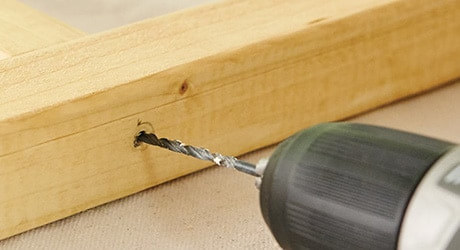
ATTACH RUNGS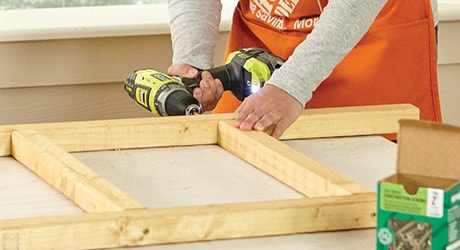
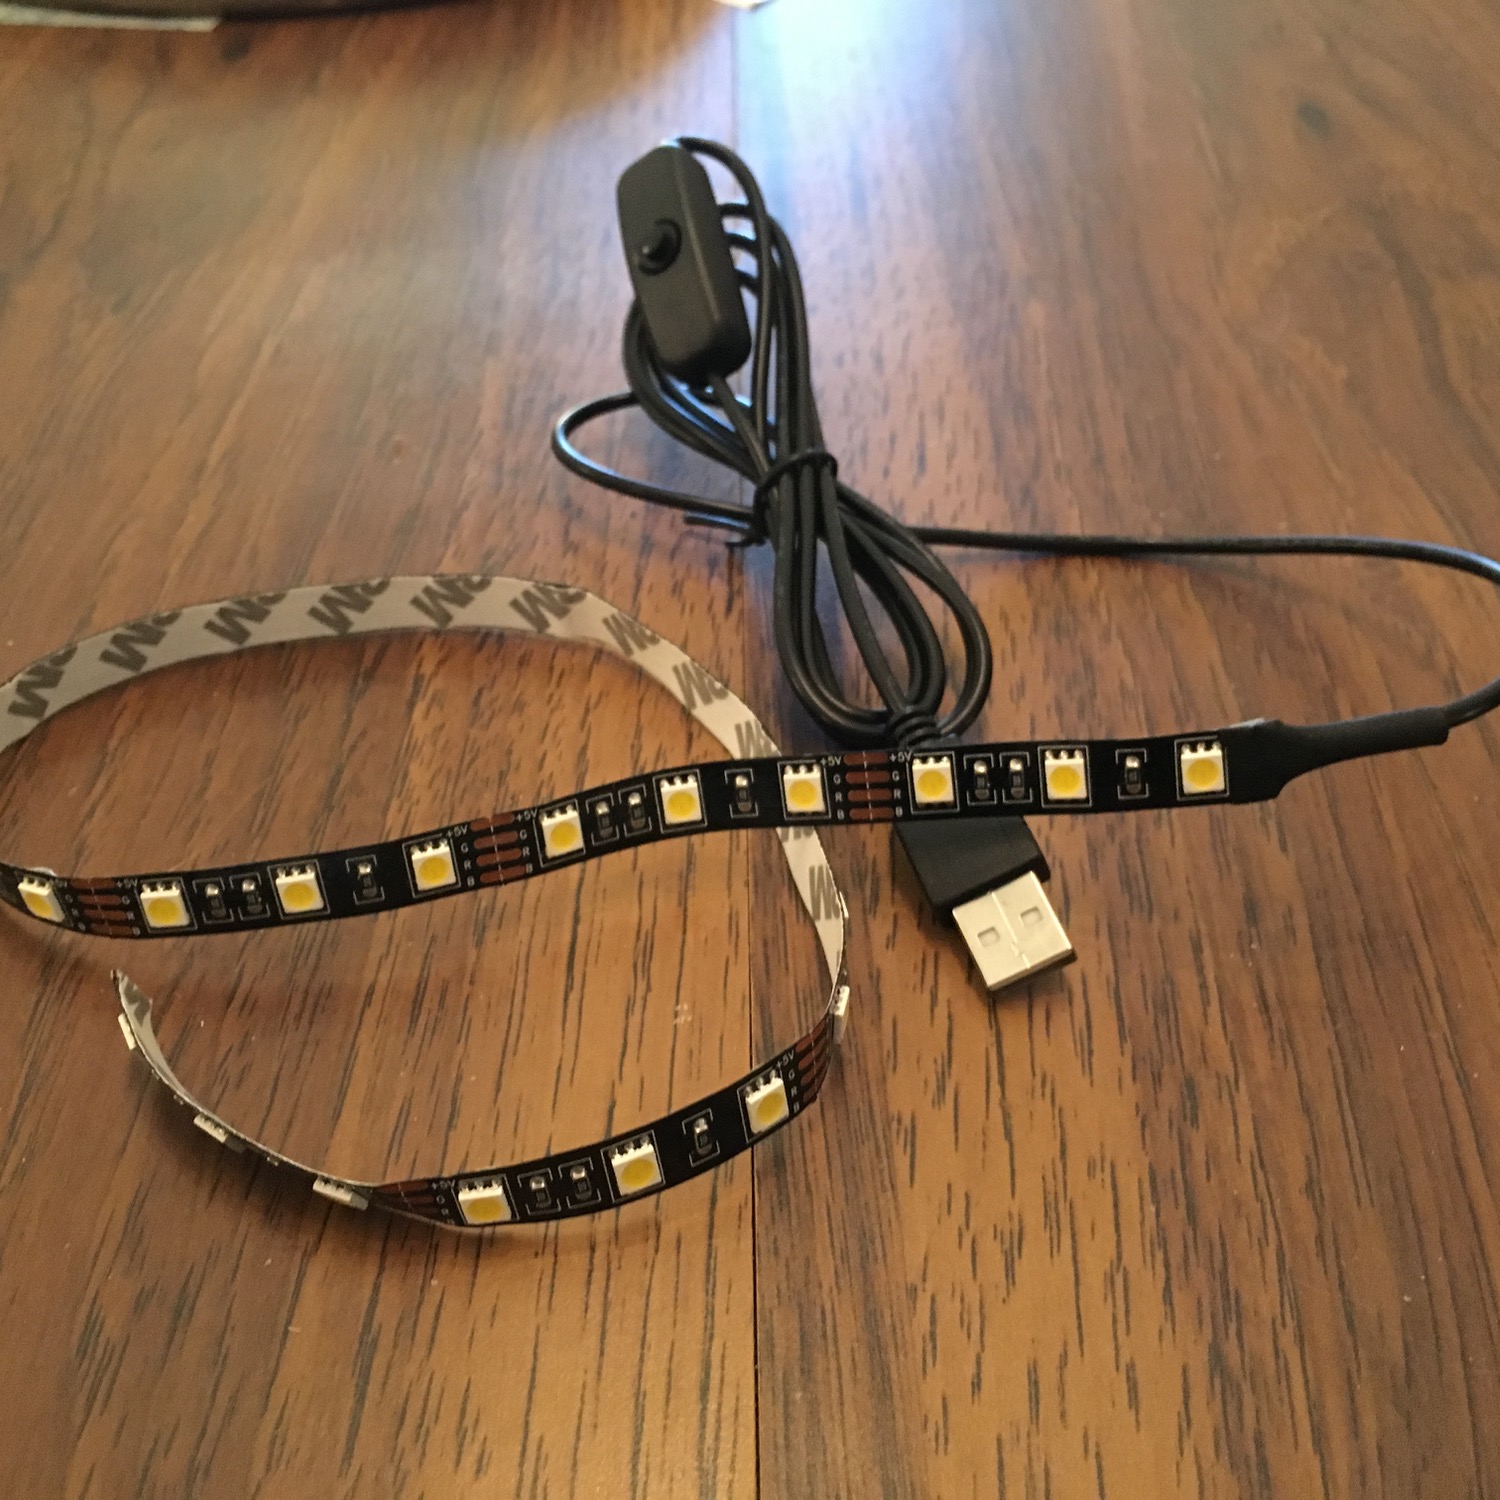
Get access to 16,000 woodworking plans >>7/10/2021 0 Comments Modern LED Desk Lamp...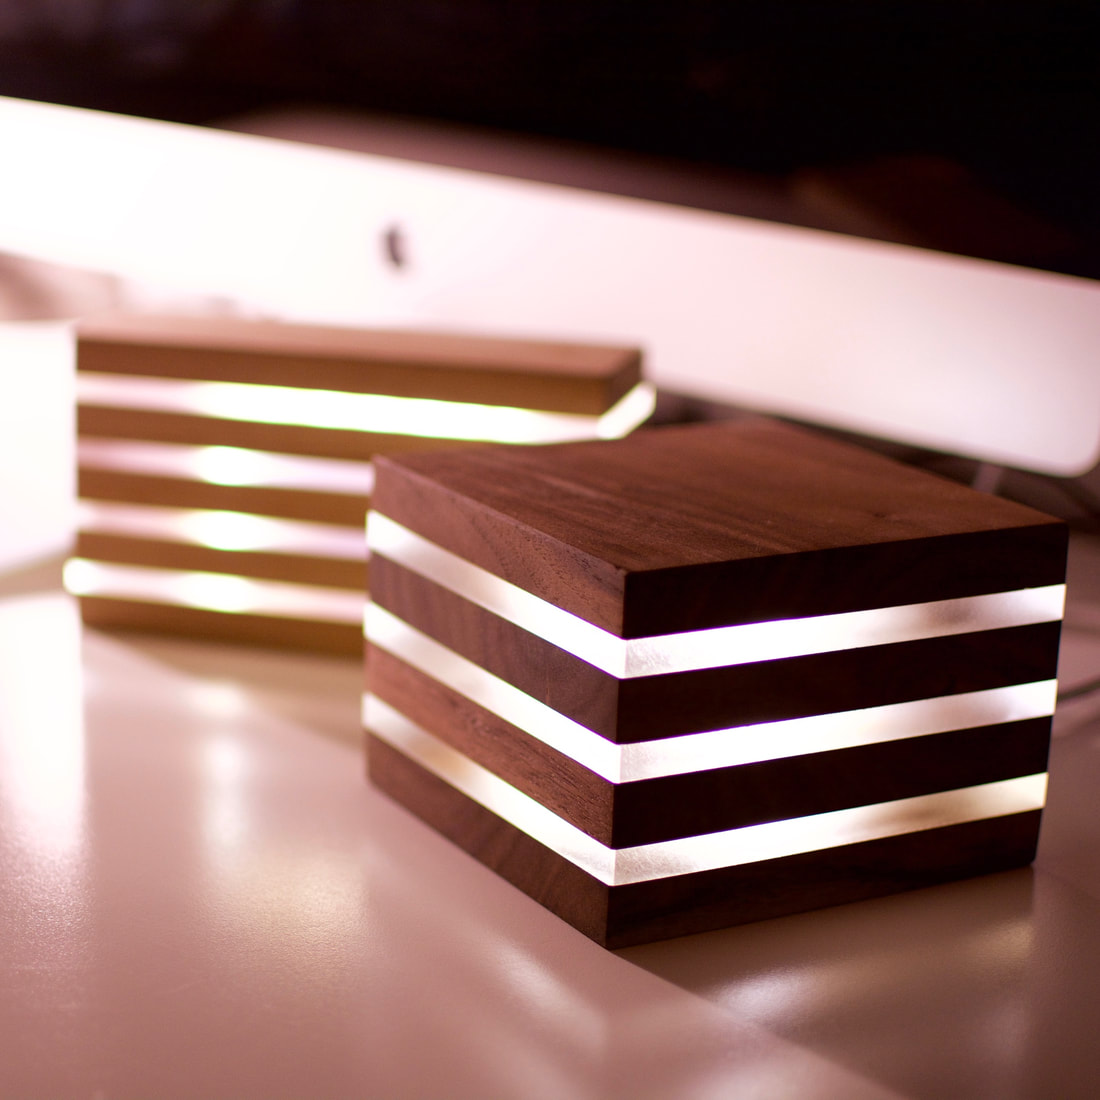 This was an entirely new project for me. I've always been fascinated with edge-lit acrylic and I figured it would make for a nice desk lamp. The sanded edges of the acrylic pieces send off a diffused glow that works great for a desk or reading lamp. The LED strip inside is cheap and safe since there is no wiring involved. As with all power tool Instructables, please use proper PPE and follow all safety protocols for each machine. This Instructable is aimed to provide everything you need to make one for yourself. But if you have any questions, send them my way. Step 1: Gather Materials and Tools
Tools needed:
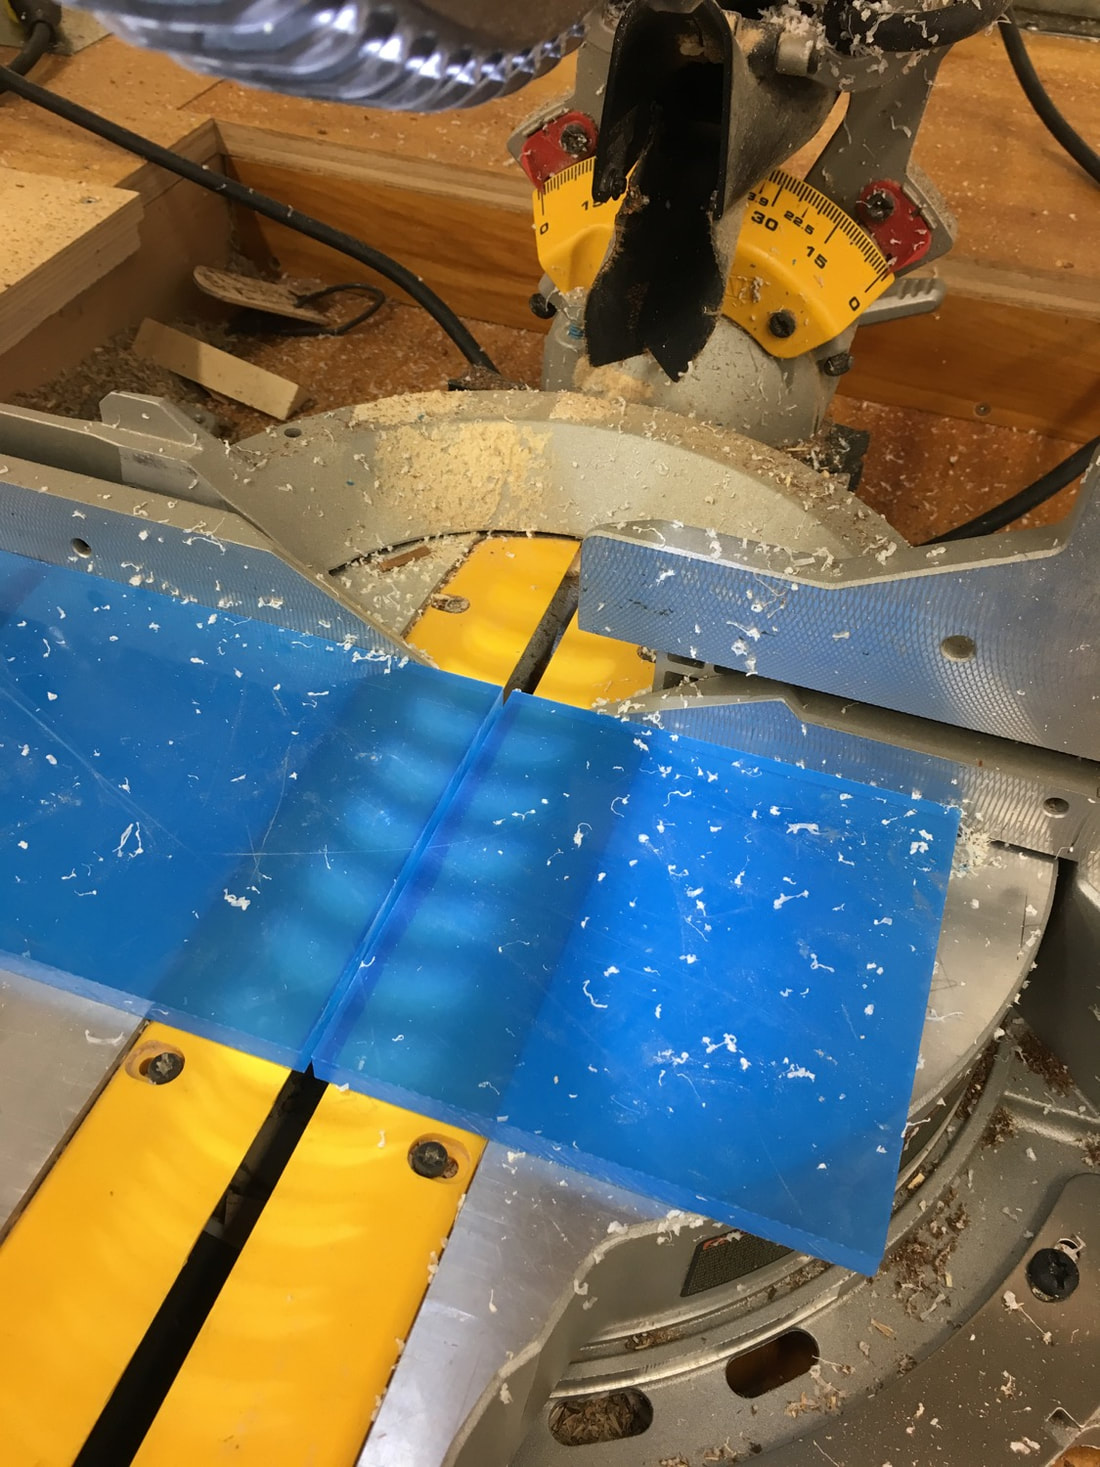
Step 2: Cut to Size
The wood and the acrylic have to be the exact same size. This is especially true if you don't have a belt sander to true them up later on. I like the look of a square lamp. So all these pieces, both acrylic and walnut, were cut to 5" x 5". Step 3: Drill Center Cavity
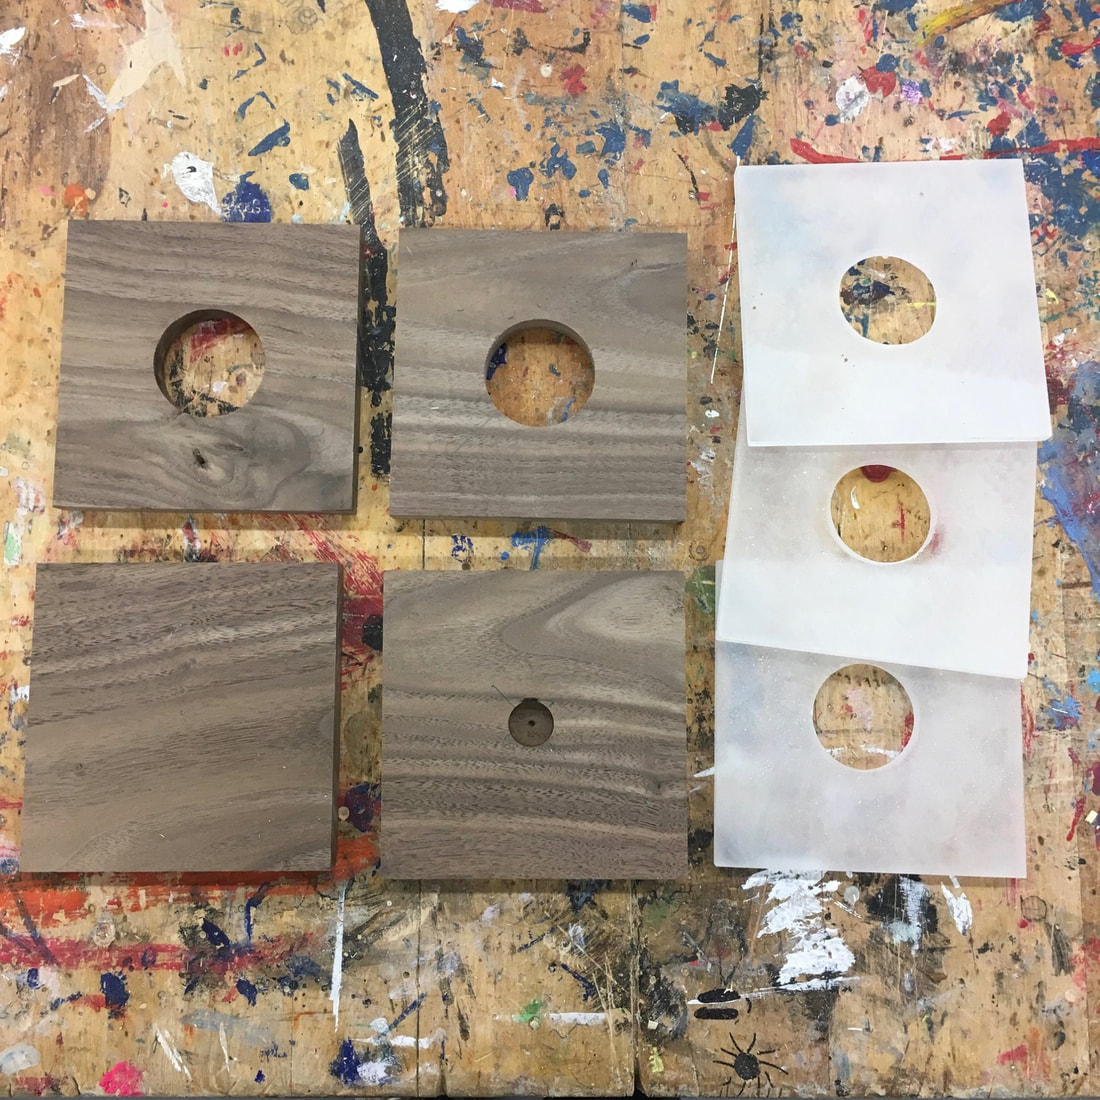
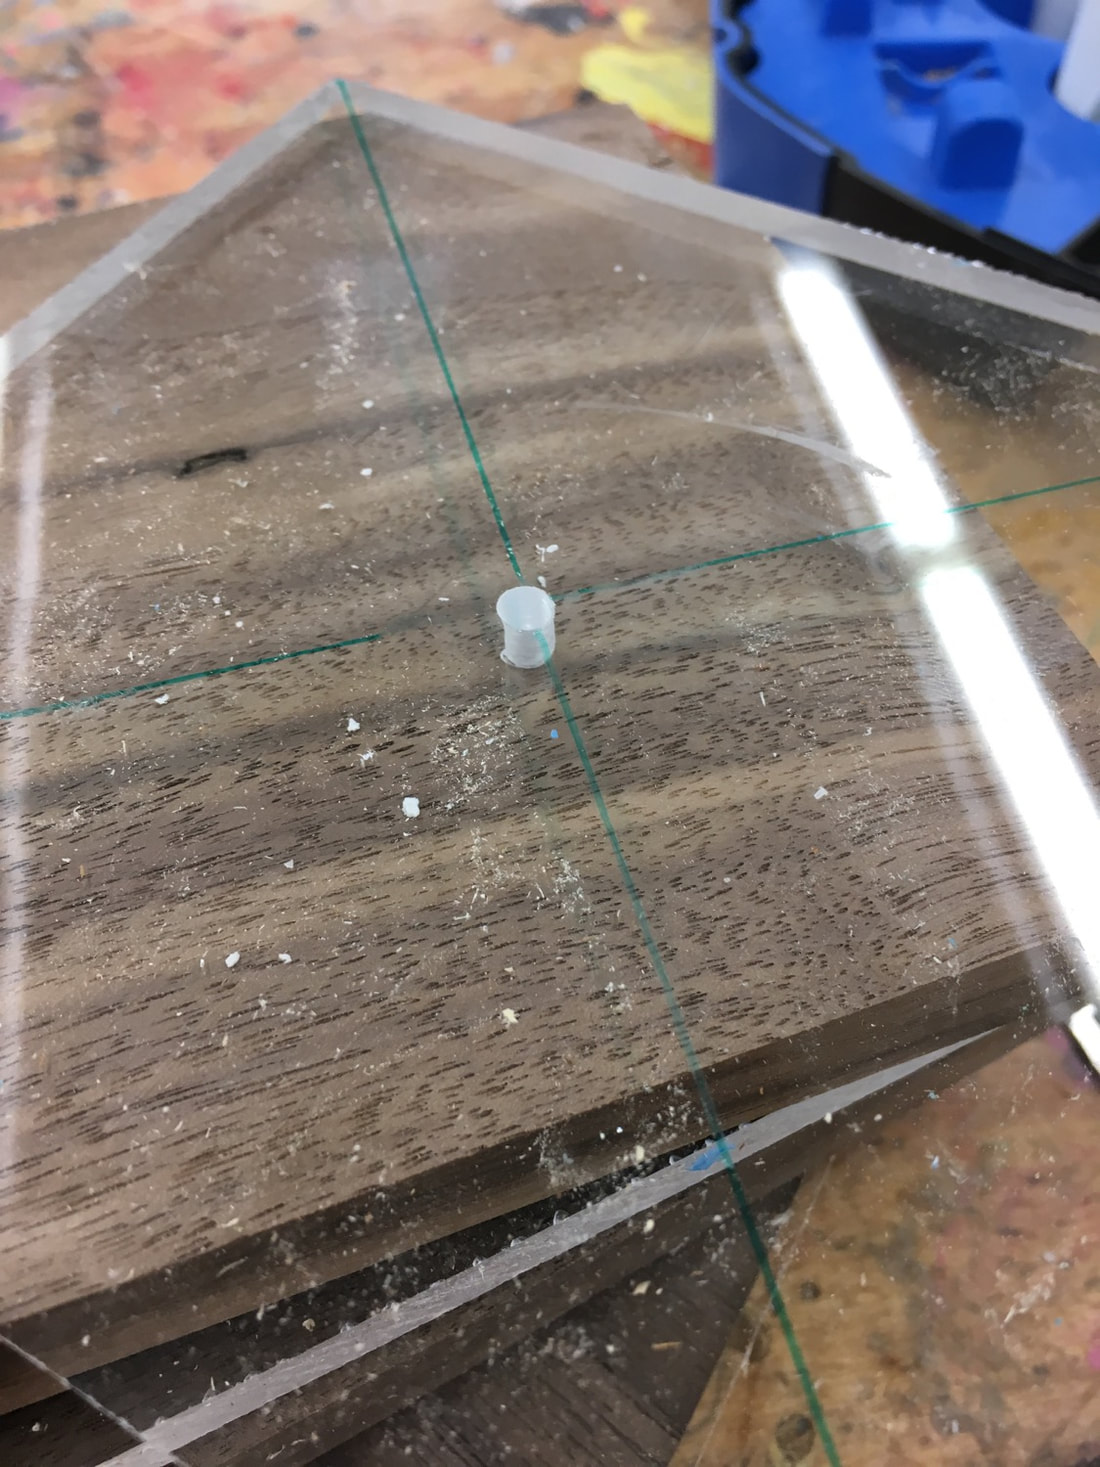
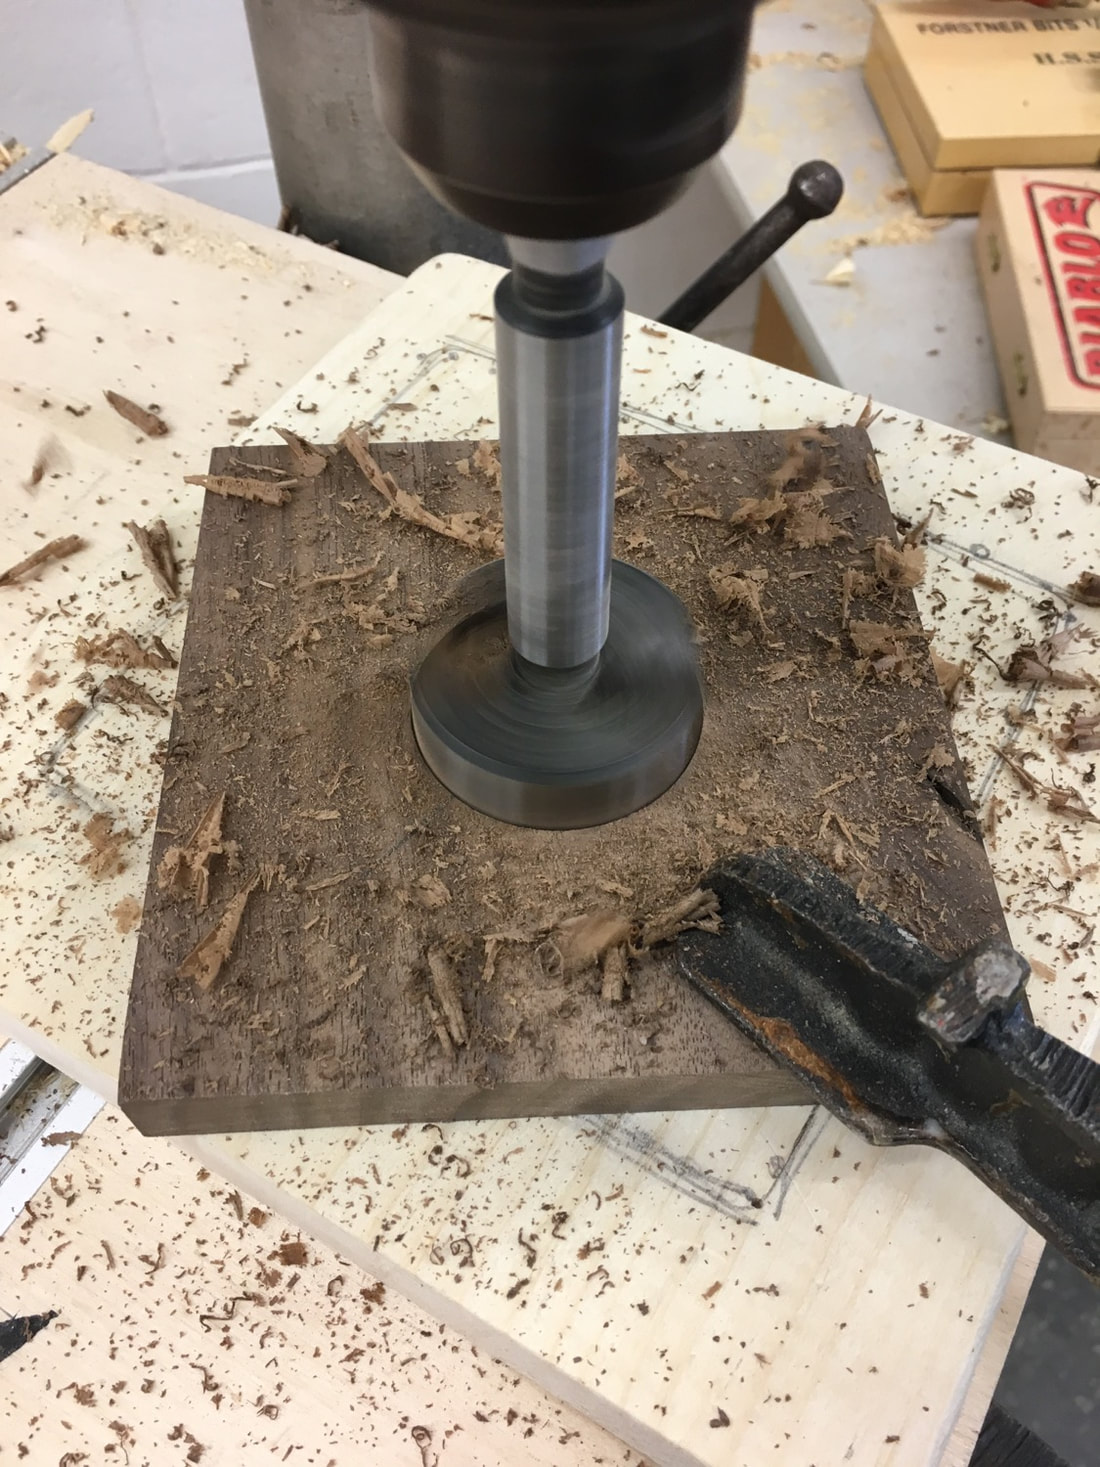
This is where the LED strip will sit and the light will come from. It isn't super important to be dead accurate with your cuts since it will be hidden on the inside, but it is a good idea to make some centre holes to line everything up. I used a 1 3/4" hole saw to cut through the wood and acrylic. Acrylic is a tough material to work with and I made sure to take every safety precaution when drilling these pieces. They can catch and spin if not clamped down tight. The centre dowel sits in a 3/4" hole on the bottom piece. Step 4: Attach LED Strip
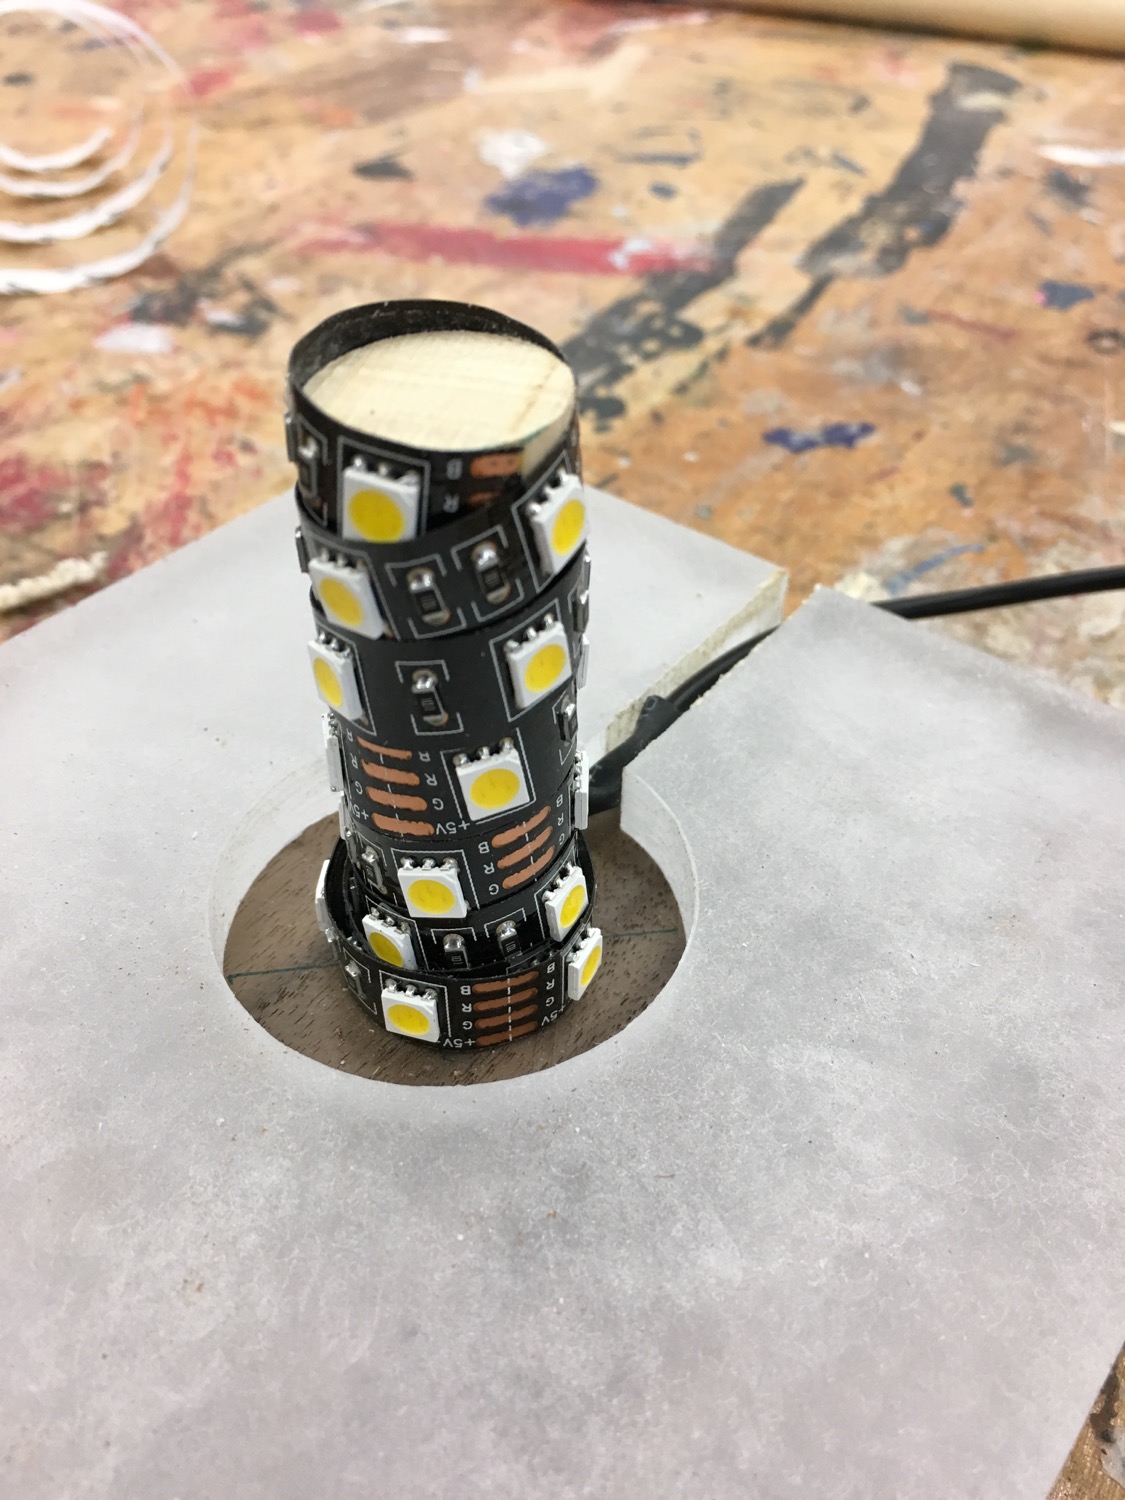
The LED strip is attached to the 3/4" dowel with the adhesive backing. Wrap it around and secure it. It doesn't matter what the orientation of the bulbs are because the glow of the acrylic will diffuse the glow. There is a little slit cut into the bottom piece of acrylic to allow the cord to exit the lamp. I used a bandsaw to make this cut, but a jigsaw, handsaw, or hacksaw will work. Step 5: Glue and Clamp
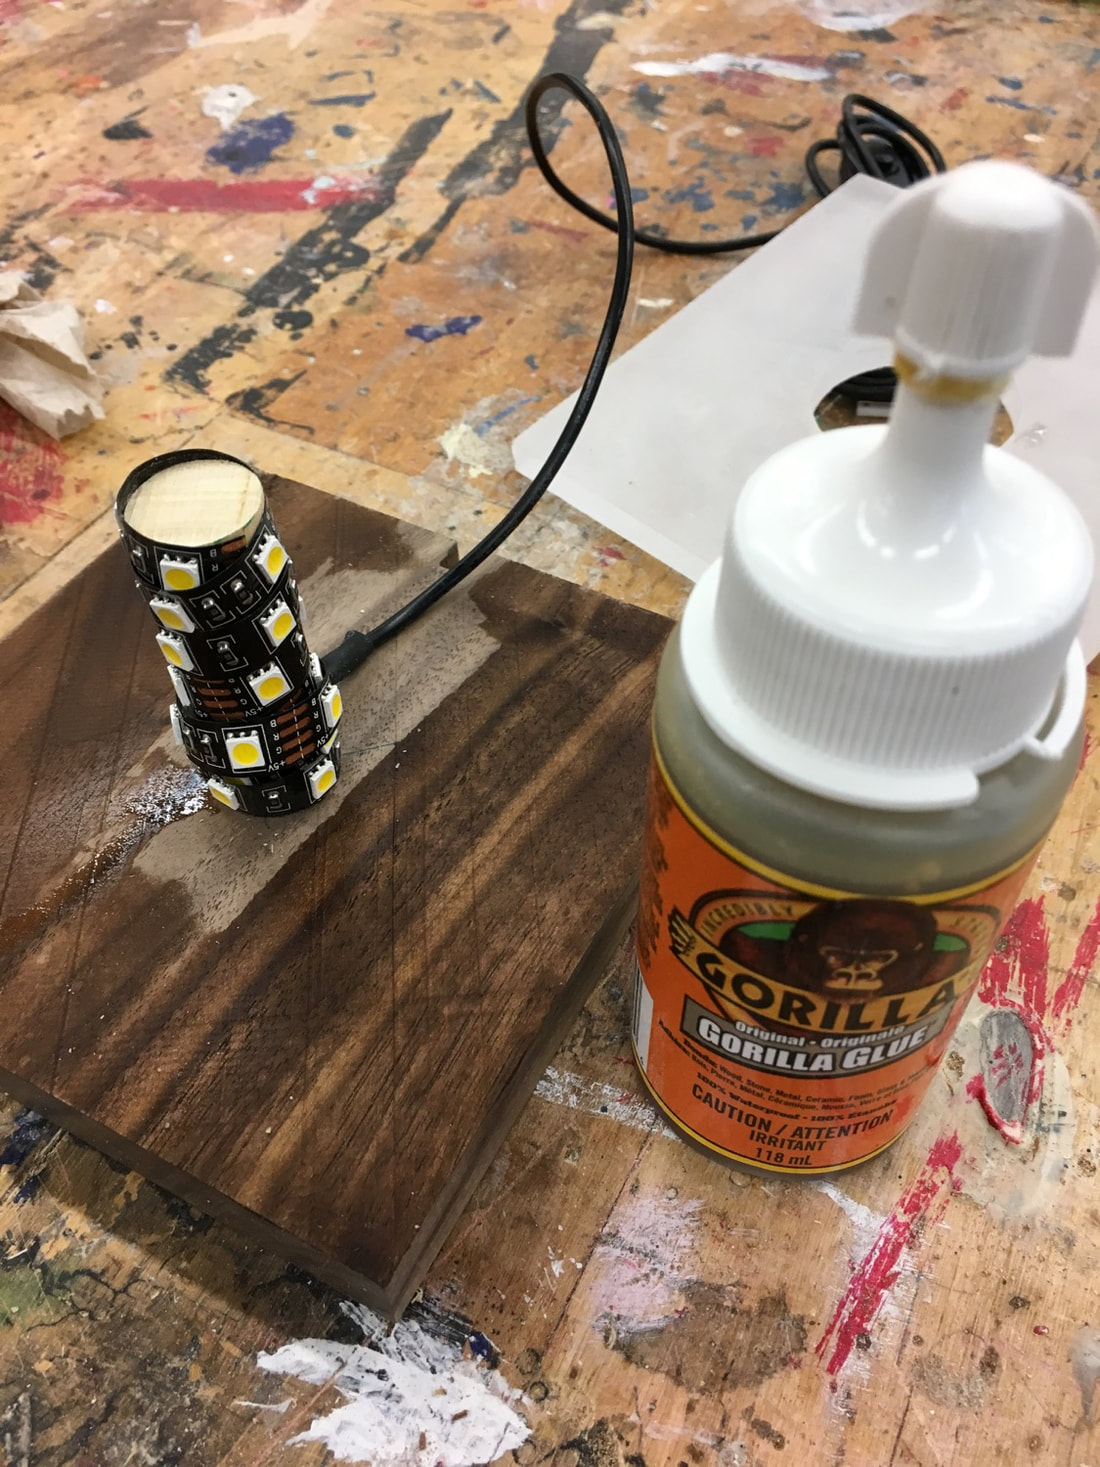
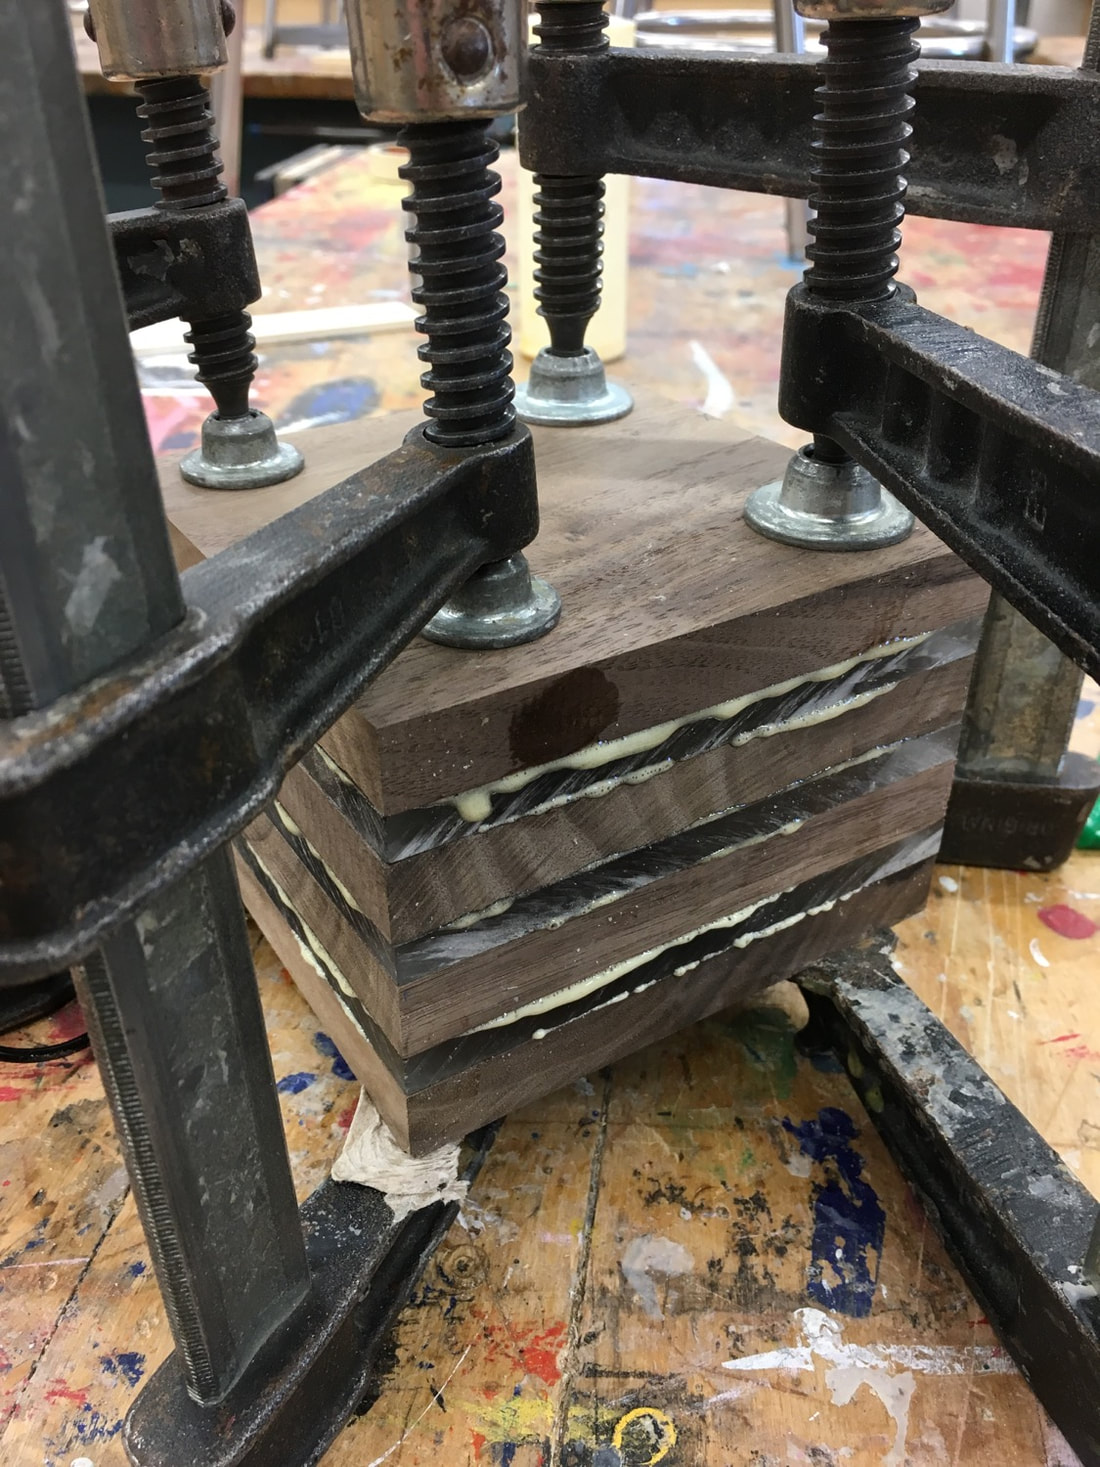
Once all your pieces are cut and the LED strip is in place, it is time to glue. Gorilla Glue will work best for this because you are joining plastic to wood. Be aware that Gorilla Glue expands greatly and will leak out the sides if you use too much. I orientated the boards so that the end grain was alternating. Clamp in place and allow to set. Step 6: Sand the Sides
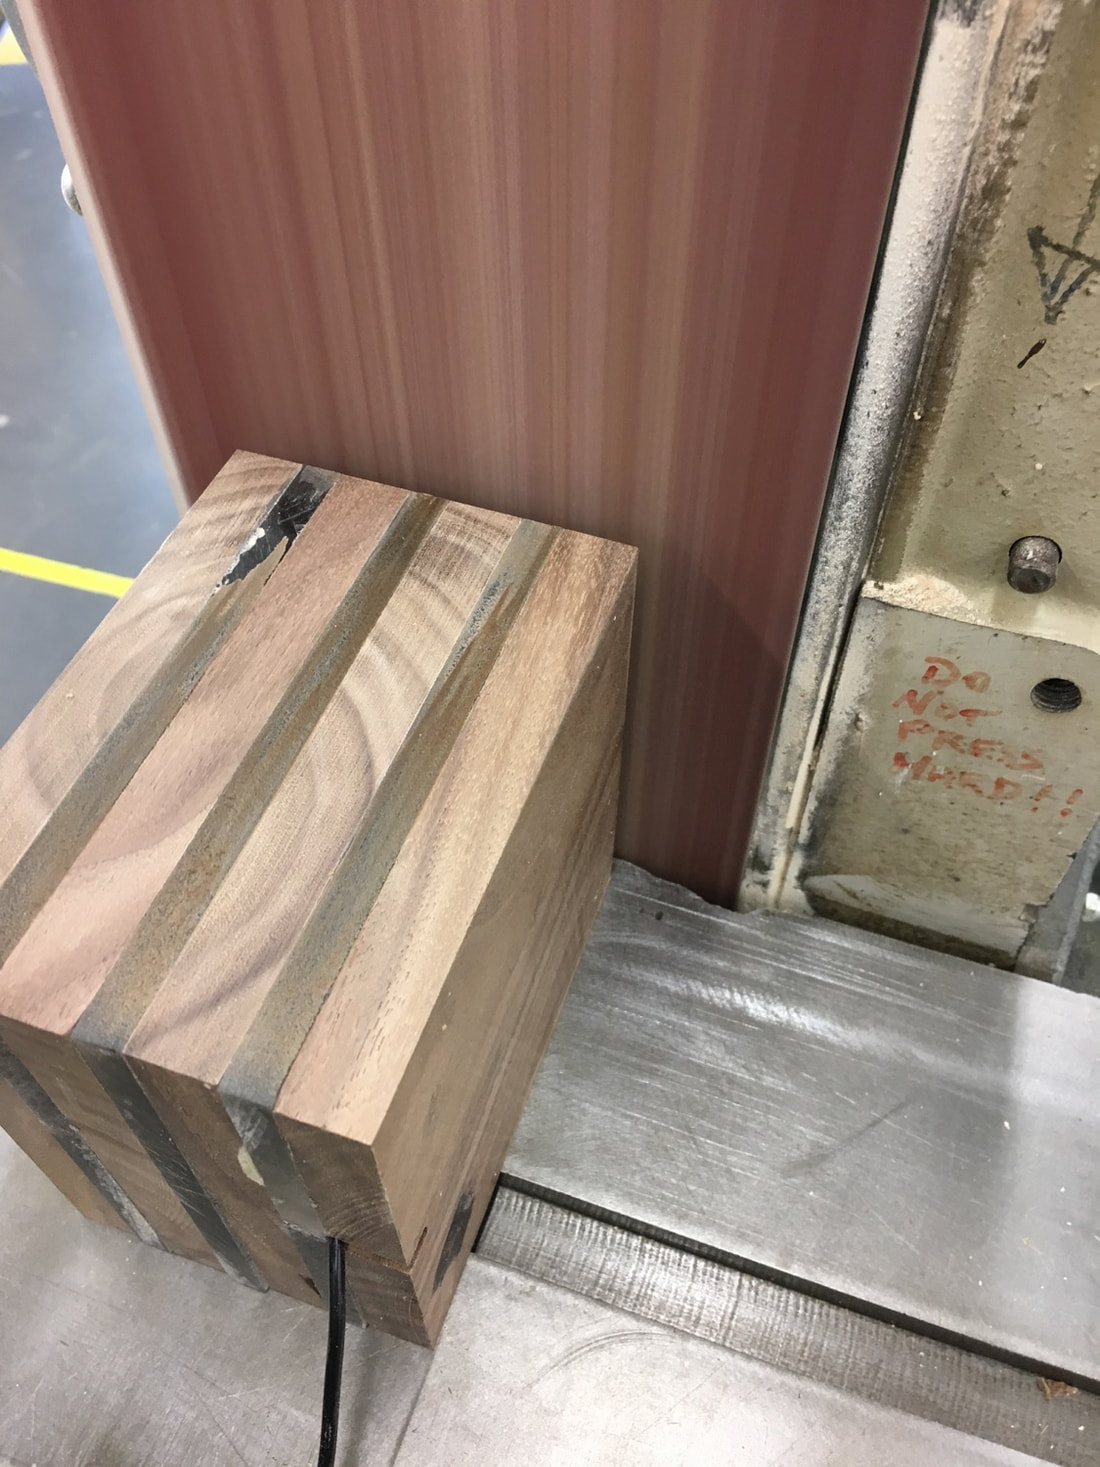
After the glue has set, scrape off excess glue and sand to finish. Using the belt sander speeds up the process of finishing the sides, but a palm sander will suffice. Be cautious of burning and melting the acrylic on the belt sander. Take small passes and allow the plastic to cool. I used grits from 80-220 on the palm sander to get a great finish on the wood and acrylic. Step 7: Finish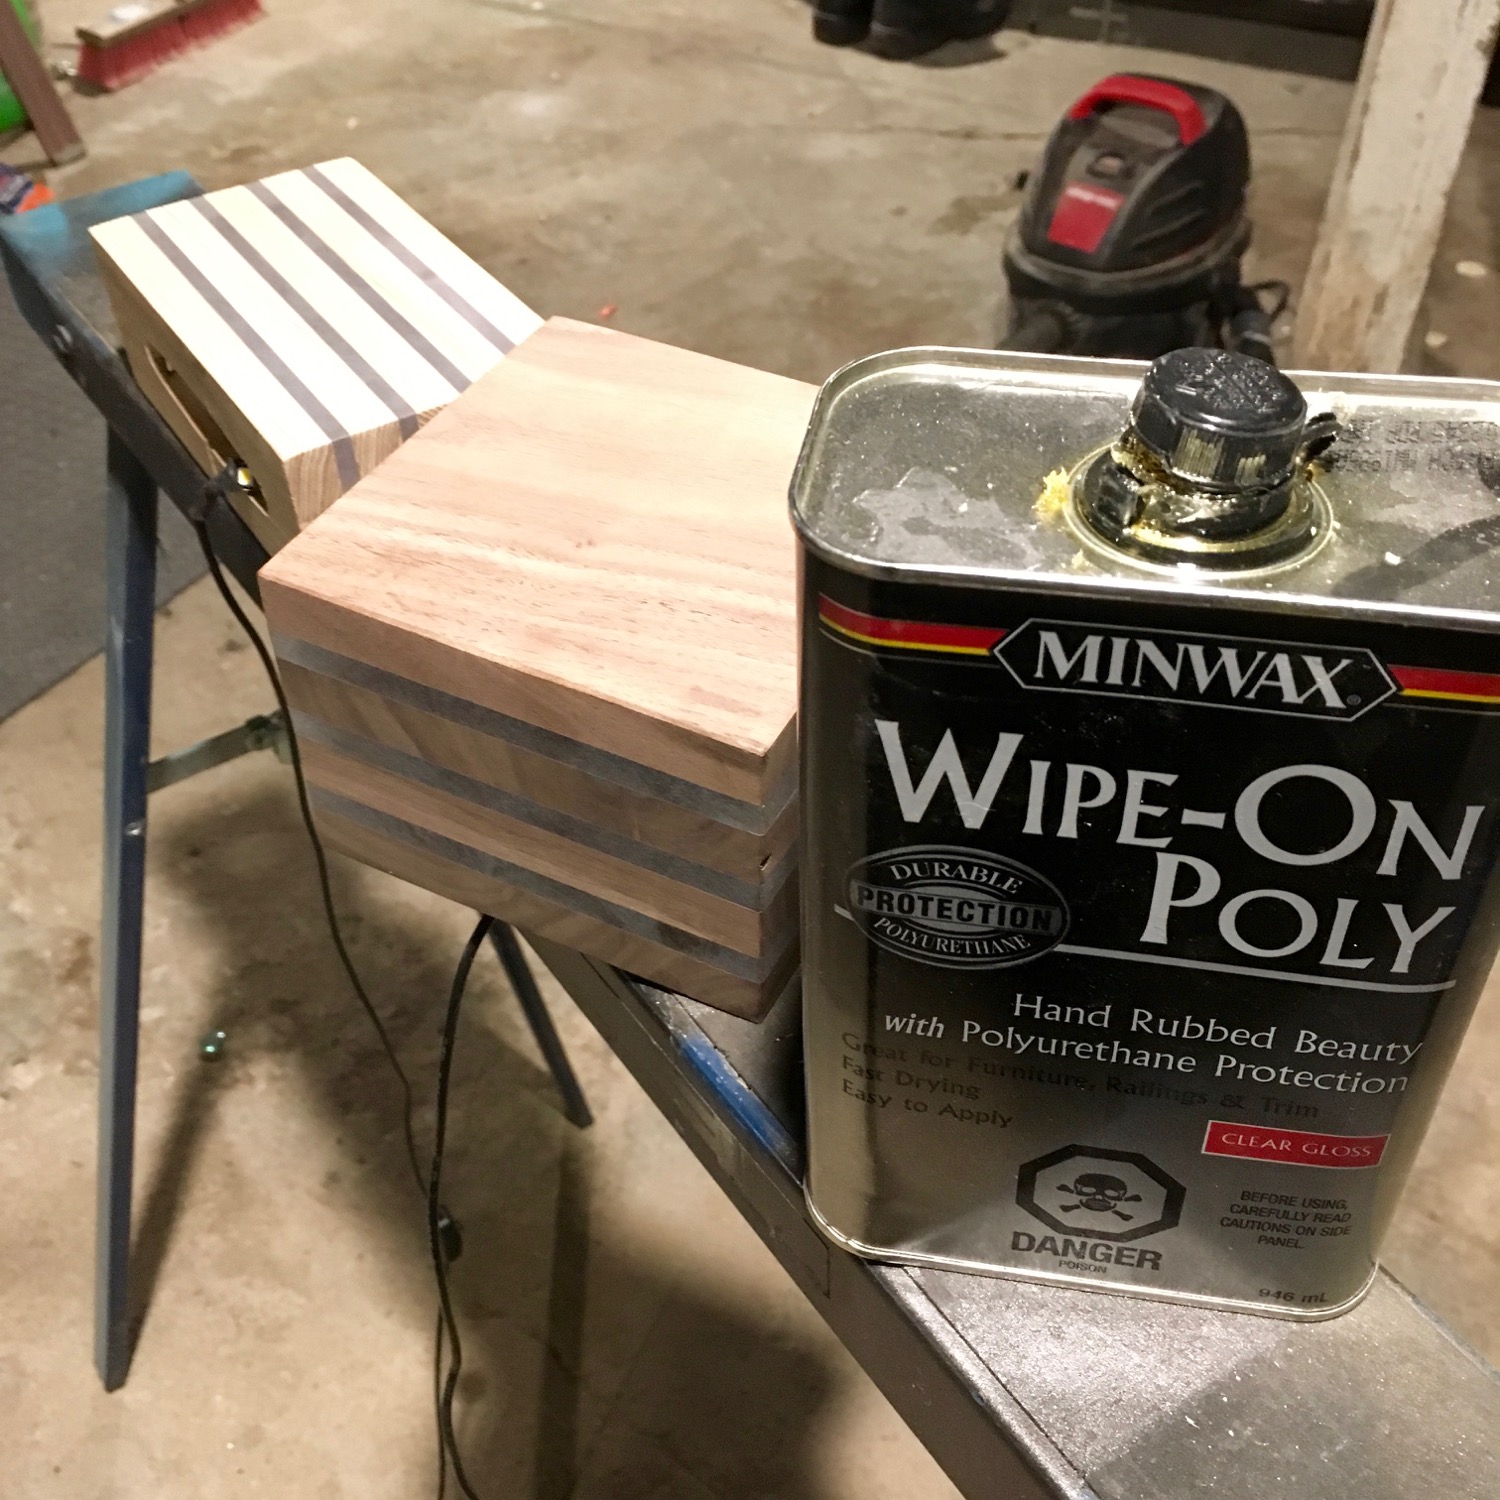 Minwax wipe-on poly gives a great finish to the wood and acrylic. Super easy to apply. Just wipe on, wipe off, Daniel san. Let dry and then it's time to enjoy your lamp! Step 8: Make Different Sizes This project can be customized to so many different dimensions and styles. It's up to you and your creativity to stack different sizes of wood and plastic and create something unique.  Get access to 16,000 woodworking plans >>While the basic principles of staining wood are fairly simple, there are a few common wood staining mistakes that beginners run into. Depending on the error, these mistakes can be costly, time consuming and just plain annoying. I want to review the most common wood staining mistakes made by beginner’s when attempting to stain and finish a project. 1. Not Sanding EnoughSanding is one of the most important steps when staining wood. The purpose of sanding is to remove any imperfections and to open up the pores in the wood to allow the stain to penetrate. Typically you’ll start with a low grit, maybe around 60 or 80 and then you’ll move up to a softer grit. How do you know when to move up? I like to take a pencil and draw a curvy line across the entire surface. Once I’ve sanded enough that the pencil mark is no longer visible, I know that I can move up to the next grit. 2. Wood Stains Do Not Protect WoodOne of the biggest misconceptions about wood stains is that they protect wood. Stains do not protect wood, stains color wood. Unless you use something that has a top coat finish built in such as Minwax Polyshades, General Finishes Gel Stain or a Danish oil, you’ll want to apply a top coat to protect the wood from scratches, UV damage, spills, etc. 3. Stain Sample Colors Are Not AccurateFirst, ask yourself if you really want to change the color of the wood. A lot of woodworkers will select their wood based on what the natural color looks like. Applying a clear top coat makes the natural color come to life. Staining wood is purely based on your own personal preference. If you decide to stain and change the color of the wood, you’ll see a lot of different color samples at the hardware store. These sample colors are not very accurate. Stain colors look different on different types of wood. My suggestion is to take a piece of the wood you’re working with to the hardware store. A lot of stores will have sample cans that you can apply to see what the color will look like. 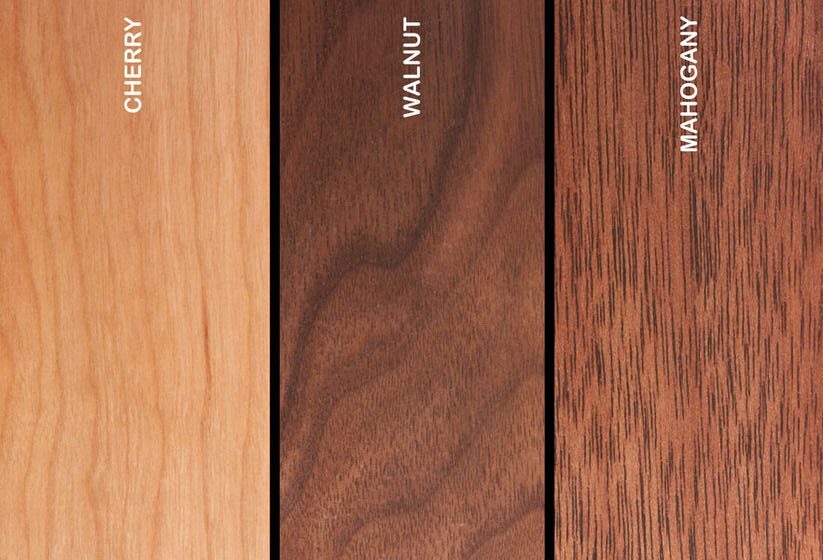 4. Proper DisposalIf you use a rag to stain your wood, it must be disposed of properly. Most wood stains are exothermic (meaning it generates its own heat) and when the stain dries on the rag it can become a fire hazard. It is recommended that you place used rags in a metal container with a lid or even in a plastic bucket that is partially filled with water. Get access to 16,000 woodworking plans >>5. Apply a Wood Conditioner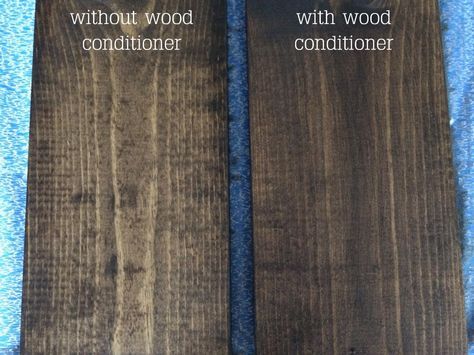 If you want a uniform color, you’ll need to apply a wood conditioner prior to applying your stain and before the wood conditioner dries. Wood conditioner typically dries within 2 hours. Wood conditioners prevent streaks and blotches by evening out the absorption of oil-based stains. While wood conditioner can be used on any type of wood, it’s imperative to use it on soft porous woods like pine, alder, birch, and maple. 6. Wipe off Excess StainWhen applying stain, to get the best results you should apply a wet coat and wipe off any excess stain. If you don’t wipe off the excess stain, not only will the stain become tacky, but it will also look blotchy. Additionally some stains dry faster than others. Oil based stain dry very slowly, where water based stains dry very quickly because it dries as the water evaporates. If you’re using a gel stain, you’ll still want to wipe off the excess stain, but there are a few different ways you can do it. You’ll want to check out this article I wrote on refinishing my kitchen cabinets. 7. You Can’t Undo StainWood stain is not paint. Stain penetrates deep into the wood where paint sits on the surface. You can sand off paint if you’re not happy with it, but stain penetrates so deep into the pores that it’s nearly impossible to “remove the color”. This is why it’s important to do test spots of different colors before staining the entire piece. Hopefully you have a better understanding of the most common wood staining mistakes. Make sure to follow us on Pinterest and Facebook for all of the latest! Essential Staining Supply List
Needless to say, it’s easy to make mistakes if your new to staining wood. Feel free to leave a question or comment below! I love hearing from you! Get access to 16,000 woodworking plans >> There are several people who enjoy doing things with wood. In this post today, we are going to discuss about a couple of simple wood working plans for beginners, that you can try on your own or with the help of a loved one.
If you happen to be like the millions of people around the world, who have nothing much to do throughout the weekends or are bored to tears with the same worn-out shows in Television. Then it is time to check out wood working and make something beautiful from wood. If you have some free time to do wood working jobs, you’ll feel a sense of satisfaction and enjoyment completing a project. Knowing the basics of building things from wood, will make you feel excited and thrilled to do more. If things works the very first time, then more and more innovative wood work projects will be completed. Some wood working projects requires time, and they need specific tools. But majority will only require a few hours of work with simple instructions to follow. Later on, when you become experienced, you have got to evaluate a particular design and know most or half of the technique to complete the work. I have found this internet phenomena named Ted McGarth, he is an expert craftsman, wood smith and understands what a hobbyist needs to undergo to create and complete a particular project. He provided for free woodworking plans that features the high quality carpentry guide ever been developed. There are a mind-boggling 16, 000 projects included in the site. The entire website offers more than 200 pages of comprehensive images, wood working diagrams, and top quality drawings techniques to enable you become a better craftsman. This no fluff guide to wood working, it is the best and includes all the foundation training for your wood working projects . Everyone has hobbies that we are proud of. Anyone who is into wood working ought to be proud, if they have completed projects to showcase to visitors and friends. if you have a few hours or even as much as a couple of days over the weekend, you need to try doing wood working. If you’re focus and need to keep your minds off issues, woodworking is the best place to start. Since you have some knowledge on wood working as a beginner, it is time to get started with your own projects. Ensure you check my other articles to get the hottest and the best news about wood working plans and projects. You know you are in for a treat whenever you go with Woodworkfingers. Thinking of starting a woodwork business, but can’t seem to figure it out? Well, you don’t need to worry because, in this post, we will discuss in detail how to start from scratch your dream business. So lets get started! It’s a great feeling to turn your woodworking hobbies into a profitable business. Wood pieces are all over the place and this can be designed into a pleasant gift to friends and loved or for sell. But, setting up a business is not as easy as it appears. It involves a well detailed process, starting from point A to point B. What I mean is, it requires in-depth planning and research, especially in business development and marketing. And this is where a business plan is vital. The fact is, when setting up a business plan, one crucial step is a having well written and organized plan. You must have a clear road map of how you intend to run your woodworking business. I understand, this could be your first time venturing into this exciting world of woodworking business, and you may not be too familiar with the business setup processes. You don’t have to stress yourself about this process, like i said earlier, I’ll assist you to transform your dream business into a reality. Before we dive deeper into your business plan, you need to realize that there are two ways of making a business plan. The first step is the formal plan that is sourcing for capital, as well as support from credit organizations. Whilst the second one is the informal ways. It will keep you directly focused on your goals as it serves as a beacon and source of inspiration. With this well detailed business plan, you can easily explain your ideas and plans to your friends and target customers. However, we’ll be working on an informal business plan. At the end of the article, i will reveal a testimony on how a friend started his woodworking business with NO capital, a few shop tools and still became very successful. So lets begin. How to Create a Business Plan for your Woodwork Business: You need to visualize and put every thought on a clean sheet of paper, make a list of things you need and want to do. Try as much to leave out the technical aspect of your business plan at this point. Just list out basic things like what motivated you and why are you doing these things. Product:What type of wooden projects do you need to create that are marketable? Make a detailed description of the wooden products and where you can get inspirations. Also identify the tools you intend to use to accomplish this task, the estimated time it will take to finish and total capital budget. Market Research:Discover the ideal market for your woodcraft. Research and analyze the leads that will help your business in a short period of time. To dive even further, you can state the selling price. Funding or Sponsorship:Identify the overall cost required to start your wood working business. However, don’t focus too much on your marketing process. For example, if you are seeking for funds to maintain your business for three to six months. Be sure on the amount of money, you will need for that duration and write down the plans on how to come up with the money. GET ACCESS TO 16,000 WOODWORKING PLANS >>Selling: This aspect covers the money making phase of your business. That is why, it is important to have a well detailed and easy to implement business plan. Like, how and where will you trade your wooden products you have made. Alternatively, this aspect can also be included in your Market research section. Although, it’s not that necessary, but ensure you address it. Nevertheless you need to consider these questions:
Marketing:What type of marketing strategy will you be using to promote your woodworking business? Do you have understanding or insight about your target market? Do you intend to utilize local means of advertisement such as flyers or newspapers? Or are you into online marketing? Using all this marketing approach can help you spread your business to lots of people around the world. Product Development:In order to have a successful woodworking business, you need to adhere to some specific steps. Things like designing a business logo and signs, website development, a business stationary and most importantly choosing an attractive business name. However, all these steps are under the product development section of the business plan. This aspect is very important, if you want your business to stand out and have a professional outlook. Final Note:Business plan are designed or developed to make you have bird eye view, on what it would look like, when you start your business. But creating one is not a 100% guarantee to success. It gives you first hand information on what to expect, that steps you need to take to prevent expensive mistakes and waste of funds. Also quite a number of successful business venture have a well layed out business plan. One important take-away is your business plan should not be done in a haste. It would be wise to go through it more than once. This eliminates any issues you may encounter while running your business. Discover how my friend Jim Morgan started his woodworking business with NO capital, a few shop tools, and a lot of nerve, in a small 10×20 foot space and grew it into a 1,400 space in the first few months while still remaining as a one-person business! Get access to 16,000 woodworking plans >>I’ve been woodworking since I was a kid but there are some things that took me years to figure out on my own. Before the Internet if you wanted advice from other woodworkers you needed to know another woodworker in real life! But those days are over now we have Twitter and Facebook to tell us what to do and we can spend hours in discussion with other woodworkers about why other people are using the wrong kinds of screws and why the brands of tools they’re using are a joke, but if you’re new to this hobby and trying to sift through all the noise, maybe you just want to get started as fast as possible. I thought I’d share some of my 40 years of woodworking experience and observations to help you avoid some common rookie misconceptions and give you some realistic advice on what you can expect as a new woodworker. What do you know now that you wish you’d known when you got started? It’s funny how many lay people think woodworking involves pounding a lot of nails glue. Once you’ve mastered how to build a relatively square box you’ll be able to make almost anything I have a theory that about 75% of all woodworking projects are just variations on a box. I’m pretty sure the other 25% are live edge resin River tables. For most woodworkers a table saw is the most used tool and the core of their shop. Rabbets and Dados are the quickest and easiest ways to join boards together without using mechanical fasteners. Other joints are fun to try but mostly unnecessary those can be personal challenges down the road. In addition to recurring expenses such as glue screws drill bits sandpaper etc the biggest cost of a project will be the wood. If you’re on a real shoestring budget take the time to look for free lumber on Craigslist or Facebook. I know I give away my excess lumber at least once a year. 1. Pallet Wood:Pallet wood is usually free and it is an option, but I don’t recommend it for new woodworkers it’s a lot of work to break them down and to get usable boards, so I think the best option is to buy pine boards and plywood from an orange or blue big-box. Home Center you’ll need to take the time to find quality boards but they are relatively inexpensive and I think pine is beautiful it’s a highly underrated species of wood. But as a ballpark figure you could build a desk like this one for under $100 using pine boards and plywood. If you enjoy making small projects, say, jewelry boxes or perpetual calendars and other decorative things lumber costs can be quite minimal. But generally speaking get into woodworking because you want a challenge and you love to build and create your own pieces, not to save money. 2. Wood Dresser:If you need say, a dresser, IKEA will almost always be cheaper than building it yourself. Either download quality plans or design your own. Sketchup is a free design program and learning how to use it is pretty easy. Trust me on this one, I used to waste a lot of time and materials just winging it in the shop, making up the project as I went along maybe making a few crew sketches with a pencil and paper. That could get very frustrating. 3. Plan Drawing:Drawing up 3D plans allows me to consider proportions and discover design problems before I turned on a single tool. Even for the simplest projects I save money on wasted lumber and I save hours just fussing around in the shop by sketching up plans first. Don’t fear your power tools but respect them. It’ll draw upon the same set of skills, but just with a lot more steps. 4. Tool Obsession:This one might be a little controversial. A lot of people absolutely love tools. They collect them and even call them their toys. These days you’ll see a lot of maker flexing on social media people unboxing and showing off their latest expensive tools. It could be intimidating and deflating, I mean don’t get me wrong there’s nothing wrong with collecting tools, if that’s what you love to do but if your goal is to build things, don’t spend so much time obsessing over them. Anyone, and I mean anyone, can build amazing things with a very modest set of tools. My mere mortals method of woodworking is the most affordable way to build, while still using modern power tools, but again woodworking ain’t free. Don’t fall into the trap of buying tools you think woodworkers are supposed to have only buy the tools that you need and know that you’re going to be using on a regular basis. LEARN MORE ABOUT WOODWORKING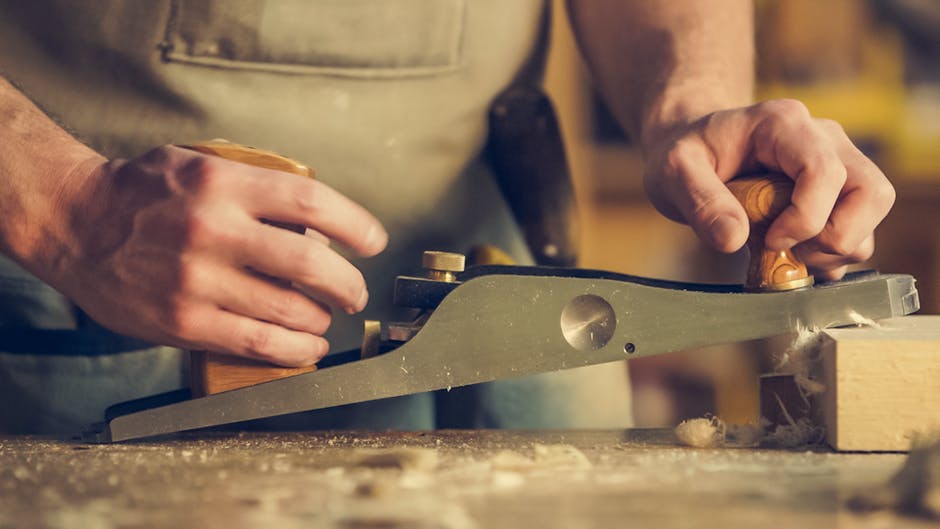 5. Woodworking Brands:Try not to fall in love with brands people love to identify with tool tribes, but in reality most power tools for hobbyists and weekend woodworkers function about the same. There’s no woodworking rule that says all your tools have to be the same color. This is something almost every new woodworker is going to experience the first time, you see purple heart at a hardwood seller you’re going be blown away by its beauty and in a couple of years it will turn brown. 6. Believe In Your Woodworking Skills:Always believe in your woodworking skills no matter your level of experience. Ignore anybody who tells you anything you’re doing isn’t “real woodworking”. I’m a big advocate of pocket whole joinery for instance, they are traditional but they’re effective and a huge help in building projects. 7. Cutting Tools:If you like to build things with a CNC go for it. If cutting things with a laser makes you happy, light up. If you’re completing projects made out of wood you’re a woodworker. If you want to be a woodworking purist well maybe chop down your own trees and fashion your own tools out of stone. Along these same lines, try to avoid thinking that whatever you do isn’t fine woodworking. Fine woodworking is a loaded term meant to kind of invalidate the efforts of others, if you just made your first project say a small end table, you just did something that fewer than 1% of people will ever do and that’s pretty fine in my book. Every project I’ve ever made has had problems and challenges and I’ve never made anything that was perfect. Just remember you can always turn the crappy side against the wall. 8. Overburden Yourself With Mistakes:Another one new woodworkers love to do. Pointing out their mistakes. Be proud of what you made nobody will notice its flaws, just the fact that you actually build something by hand is awesome. You could have spent the entire weekend playing video games or watching Netflix, but you created something from nothing. Just let that sink in, you have my permission. Use whatever space you have. If you have stationary tools put them on casters and roll them out when you need them. You can have a fully functional shop in the space it takes to store a lawn mower and a couple of bikes. Almost every mistake can be salvaged and fixed rarely do you need to start all over again if you goof. Find creative solutions to problems. See there’s nothing that can’t be fixed. If you don’t do a good job sanding imperfections are going to show up when you apply finish and you’ll regret it. 9. The Mere Mortals Method:The mere mortals method of woodworking is the most affordable way to build while still using modern power tools but again woodworking isn’t free. Once more don’t fall into the trap of buying tools you think woodworkers are supposed to have, but only buy the tools that you need and know that you’re going to be using on a regular basis. This is something almost every new woodworker is going to experience the first time you see purple heart at a hardwood seller you’re will be blown away by its beauty and in a couple of years it’s going be brown. It’s a nice brown, but it doesn’t stay purple. Ignore anybody who tells you anything you’re doing isn’t “real woodworking”. 10. Experience:Lastly, experience is going to improve your woodworking more than anything else. It’s really about getting in the reps, the more time you could spend in the shop making things the more confident you’ll become and the better equipped you’ll be for handling problems. Plus you’ll be able to make more informed tool purchasing decisions based on what you discover that you actually need. 11. Learn To Control Your Cost:Any form of business needs one to know how to calculate the costs if you want to get the profits. You need to have a proper way of calculating the costs. LEARN MORE ABOUT WOODWORKINGHardwood, rare-earth magnets, and a chisel that won't slip out of alignment.As I was inlaying a maple “S” into a walnut plaque, I came up with the idea to magnetize the block I was using to guide my chisel. The new block keeps the chisel much more stable as I pare back the recess to my layout lines (after routing away most of the waste). To make the guide, I jointed two adjacent faces of a hardwood block, cut two grooves in the vertical face, and epoxied two long rare-earth magnets into the slots. They sit just below the surface of the wood, which lets them hold the chisel firmly without impeding its sliding action. I found the magnets on Amazon.com, and made the block wide enough for my widest paring chisel. It works so well that I’ll be making one at 45°, and another at 90° with a vertical fence glued to it, to guide my mortise chisels. For more Tips Join Here |